Tuesday, 24 June 2014

Chambray Maternity Shirt Dress

Good Morning! Wow this is like my second post in two days, I must be on a roll...

I actually made this dress a couple of weeks ago, when my normal clothes started to feel snug. But, as soon as I'd made it, I felt it was too much of a tent to wear, even with the belt. Well we're a few weeks on now and I actually have a little something to put in it, so I didn't feel so self conscious to have some photo's taken in it.

IMG_20140624_091707

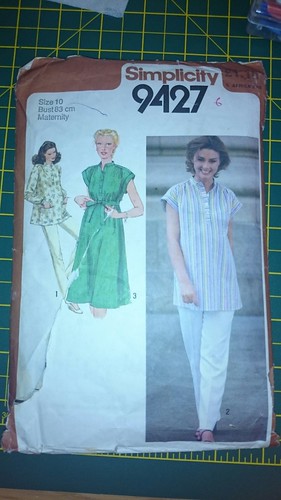
I'd found this pattern on eBay and it was my first maternity pattern. I think it's from the late 70's/early 80's. As I've previously mentioned, I'm not a fan of maternity patterns, of all the patterns I have seen I just haven't connected with. I'm not a fan of super stretchy cling to the bump clothes unless I'm being casual or lying around the house!
IMG_20140624_091525
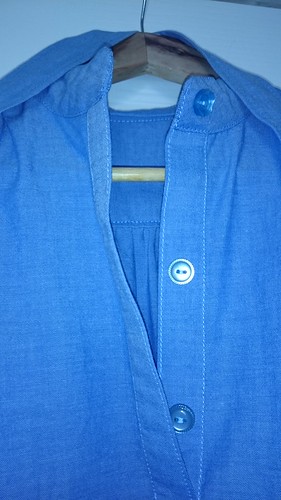
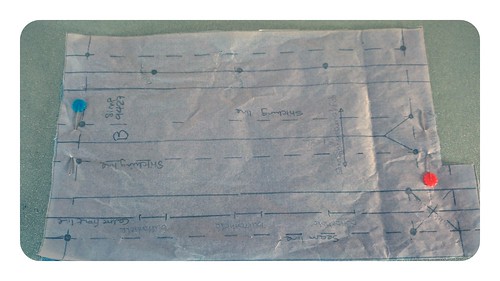
So I get the pattern out and trace off some of the pieces. This piece particularly scared me. So I thought I'd better trace it before I messed it up! However, I stuck to the instructions and you know, it didn't really turn out that bad. If you hadn't guessed it, this is the piece for the button placket at the front:

DSC_0324

Notice I didn't bother with the buttonholes, I decided I probably wouldn't use them anyway. The only reason I put the buttons on was to stop it from looking too much like scrubs. This was the first comment that Barry made when I'd finished it - he's such a charming man at times!
IMG_20140624_092414
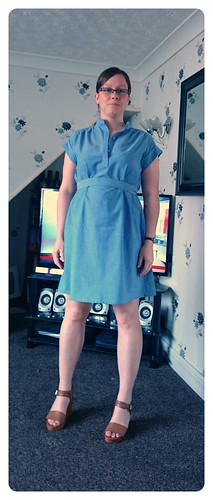
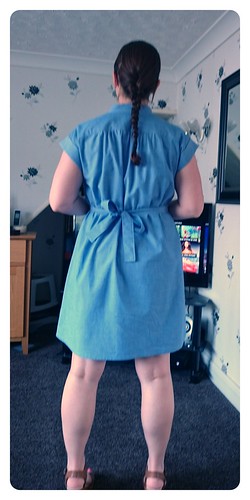
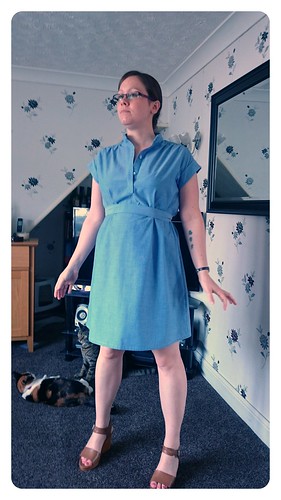
Tada! This is the finished dress. I think it goes really well with my new Clarks sandals, that I must say are super comfy for high heels.

IMG_20140624_092309IMG_20140624_092130IMG_20140624_092239
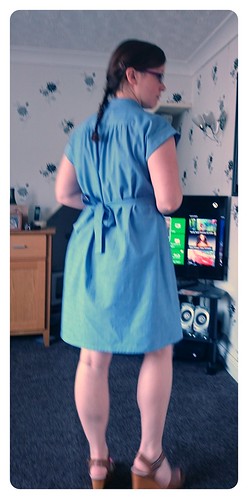
I do quite like the gathers at the shoulders and below the yoke at the back. Without the belt it looks like a tent, but once the belt is on I think it kinda looks cute with all the gathers flowing down the back and the bow of the belt.
IMG_20140624_092058
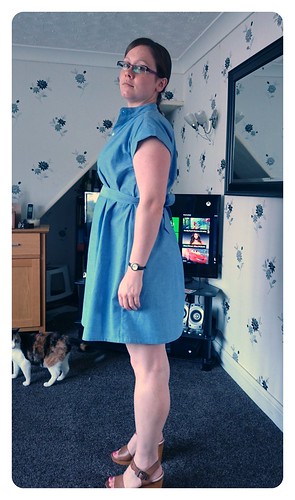
(Gratuitous cat fight in the back ground)
Overall I'm quite happy with this dress. I still feel like it's a little big, but I'm sure I'll grow in to it. As it was my first maternity dress I didn't make any major adjustments because I wasn't even sure how it was going to turn out. I did however, shorten the dress pattern pieces by about 8 inches, as this was obviously made for a giant and not the teeny tiny 5'3" girl that I am!
Monday, 23 June 2014

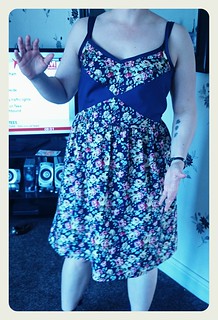
Centaurée dress - Deer and Doe

Did everyone enjoy the gorgeous weather at the weekend?

After completing some driving duties on Saturday and expecting to be working on the Sunday too, the boss said that due to the work being carried out on the Sunday (involving CS gas!) if I don't want to come in I don't have to. How on earth could I pass that opportunity up? Usually when it's a weekend in, you have to be in for the full weekend. Lucky me!

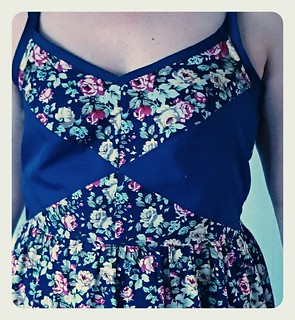
So, I knew this was a perfect opportunity to finish off my newest dress. Literally the minute Deer and Doe advertised their new dress I was in there buying it. Looking at the pictures and the description I thought that this could be quite an interesting challenge, after all, how many bodice patterns are constructed with what appears to be triangles?

IMG_20140623_092246

But, despite my preconceptions, it was actually quite easy to construct. Easier than princess seams, that was for sure, there was no easing required, so it came together really quickly.

IMG_20140623_092055 IMG_20140623_092134IMG_20140623_092027
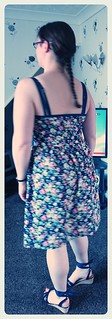
I would say, however, that I'm not completely happy with the fit of the bodice. But, this is not a maternity pattern, and so I had decided to go up a couple of sizes in order to accommodate my 'in between' bump. I'm not small enough to fit into most of my regular clothes any more (especially not jeans). However, I'm a little on the small side for maternity clothes. 
  
IMG_20140623_091846

You can just about see my bump here! I've actually got a few pairs of maternity jeans, because it's just not practical to wear dresses all of the time, the 'under the bump' pair are a lot more snug than the 'over the bump' pair, but I'm finding that the over the bump style is a lot more comfortable even if I spend half of my time hoicking them up!

IMG_20140623_091955

You can see here I have a little extra under the bust, with the creases. These pictures were taken this morning and I do find that first thing on a morning I'm at my smallest, so towards the end of the day the dress actually looks as if it fits a little better.

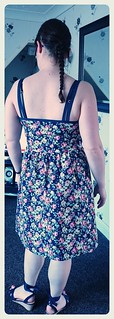
I don't know if you noticed, but I used shop bought bias binding. I kinda regret this now. I think I went for larger than I should have and so the straps don't sit right at the front. So, instead of letting them sit straight up, (which made them look a bit odd) I decided to allow them to cross, which allowed them to sit flat. Next time I make this dress I will be making my own bias tape from the instructions!

IMG_20140623_091924

All in all, I'm really pleased with how this dress has turned out. Even though the fit is a little loose and the bias tape isn't quite the right size. As I grow, I think it will fit a little better and I'm hoping I can wear it for most of the summer. I will definitely be making it again, but I think I'll wait until next summer!

Tuesday, 10 June 2014

Jeans re-fashion and a Stripey dress

Good Morning! Posts are getting few and far between, some days I feel like I've lost my sewing mojo and others I realise that I am just to tired to get in to it. But, over the weekend I think I've managed to get it back and I managed to finish off 4 cushion covers, re-fashion a pair of jeans, hem a dress that's been in the making for some time and fully complete my first Maternity dress - yes the reason I've been so exhausted!

I started this dress prior to finding out about my pregnancy and before my waist had started to expand. I should have seen it coming, I'd made a couple peplum tops, one out of my favourite vogue pattern and the finished product felt just a little too snug. I thought it was due to the stiff fabric. Then I started to make this dress using the bodice from Vogue 8815, which from the previous result I decided to make the seam allowances a little smaller and reduced to 10mm. It still didn't feel right and I looked rather dumpy in it. In hindsight I would have thrown it in the UFO box to complete at a later date! I still need to complete the lining, but I'm not really all that interested in it now I can't wear it!!

DSC_0322 DSC_0323

Look at that, I even under-stitched the arm holes, you have no idea how proud I was of those! I will put the dress away and return to it next year, with the intention of wearing it next summer.

I also had a go at re-fashioning an old pair of Etam jeans. I'd previously seen a post from Andrea where she'd re-fashioned jeans from being boot cut to skinny. I've been itching to try this on these jeans for some time now and seeing as I also wanted to turn them in to maternity jeans I thought I might as well give it a go.

DSC_0320DSC_0321

I was really pleased with the boot cut to skinny adaptation, however, I do not like the little triangles of jersey I inserted at the side seams to adapt them for use in maternity. I think I went a little too far down the leg, so unless I wear long tops they are a little too obvious. I'm also not quite big enough for them so a belt would be required. I think I'll have to go back to my sewing desk with these and have a re-think!

I've also completed a maternity dress, but I want to model that one so watch this space...