Tuesday, 29 July 2014

Simplicity Jiffy 1356

Good Afternoon peeps!

This dress was totally inspired by a tweet from @StitchOdyssey back in June, who was undecided on it. But I knew as soon as I saw it that I had to have it! Reality, however, is a slightly different story...

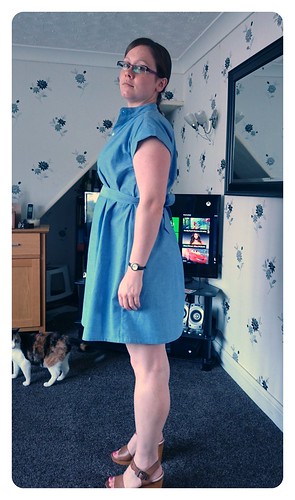
Seems like I finished this dress ages ago - according to my Twitter account 13th July! I've just not got round to getting any pics taken. I also haven't worn it. I just keep looking at it and putting it back in my wardrobe because I'm just not 100% sure that I like it. But then again I feel like that about everything nowadays.

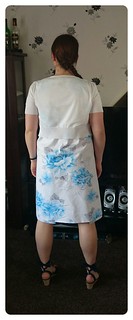
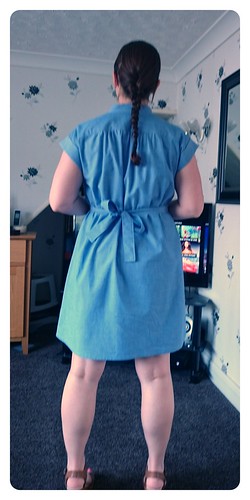
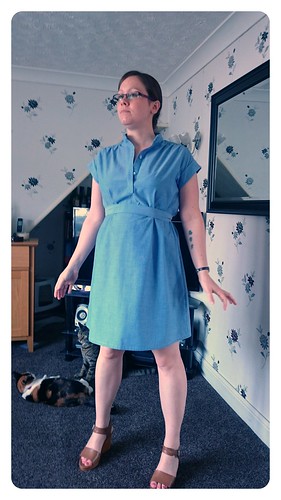
IMG_20140729_101603IMG_20140729_101636 IMG_20140729_101709

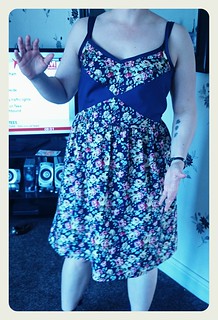
I've teamed it up with a little white cardi I got from Tesco's last summer and some blue sandals from Matalan that I absolutely hated last year as they are too flat, but funnily enough this year they've barely been off my feet since the sun came out!

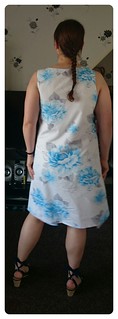
IMG_20140729_101741 IMG_20140729_101915 IMG_20140729_110535

This is without the cardi. Think I prefer it with the cardi on. But I'm not much of a fan of sleeveless anyway.

It was incredibly easy to make, as long as you follow the instructions. I kinda winged it to begin with thinking I could pull the dress through at the shoulder seams - what was I thinking? Must have been a 'baby brain' moment because that just wasn't happening. I referred back to the instructions and un-picked a fair bit of stitching and got it right in the end!

I did not make it double sided. I like my necklines under-stitched and stabilised with fusible interfacing. Although I could probably wear it either way round, I probably won't. The big blue flowers are far more interesting than a plain white cotton dress (Which is what I used for the other side).

IMG_20140729_110602

In my opinion, this dress isn't very flattering. It has very little shape, but that may be accentuated by my growing bump that's kinda making me look shapeless enough as it is! It is however, very practical used as a maternity dress. I graded from a size 10 at the shoulders to a 12 just under the bust and then out to a 14 from the waist down. 

I'm pretty certain that even at my biggest it will still fit, you attach 2 pieces of ribbon on either side of the front dress piece (one under the bust and one on the waist on both sides) and then you have the tie at the front, both of which are quite generous in length. It's very comfy indeed, so despite my reservations as to whether this dress is truly 'me' I'll definitely get my wear out of it!

Have you made one of these dresses? I'd love to see it on other people, who knows I might even make another post- pregnancy!

Monday, 14 July 2014

Style 4145 - A vintage maternity dress pattern

Good Afternoon, did you have a nice weekend?

I had my Dad staying with me due to some unfortunate issues with one of his houses, but he's now returned to his home in Spain. I won't go into any details about it, but it has been a very stressful week for him and my Step-mum. Fortunately, the Tour de France is on at the moment, which very quickly lifted his spirits and gave me a few hours to get some sewing in (he's Cycling mad).Then, the World cup final was on last night, so I got another couple of hours to spend on sewing, Sports season is just the best!!!

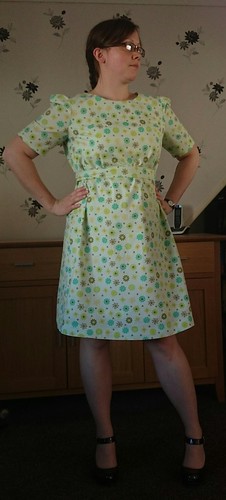
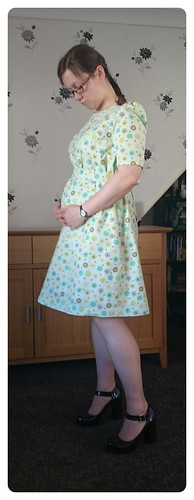
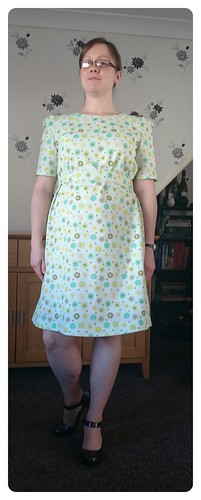
So I have a couple of projects on the go, one of which I think I will get to share very soon. Today, however, I'd like to share with you a dress that I finished last week. I was very excited to receive this pattern that I'd bought from eBay. I'd seen an episode of that old show 'Bewitched' where Samantha was pregnant and I totally adored the style of dress that she was wearing, so when I'd seen this pattern I knew I had to have it. It's not exactly the same as the dress that Samantha wore, but a similar style with fitting coming from the seam just above the bust.

I picked option 2, but I had no idea what fabric I was going to use to make it with. So, I had a rummage through my stash and picked out some rather fitting fabric (IMO). It's some Moda quilting cotton that I picked up from my local sewing shop in Darlington.

IMG_20140714_085933

I didn't really make any adjustments to the dress, apart from lowering the neckline a little. The original neckline would have strangled me so I had to make it a little bigger, but as I had traced out all of the pieces that was no big deal.

I started off by making a toile, I wasn't sure how this pattern was going to fit and I hadn't made anything from a 'Style' pattern before. They seemed to have been a fairly mainstream pattern company back in the day, but when I have searched the internet for more information about them I've come up with nothing. Were they bought out by one of the other main pattern companies or did they just change their name at some point??

IMG_20140714_085906 IMG_20140714_085826 IMG_20140714_085731
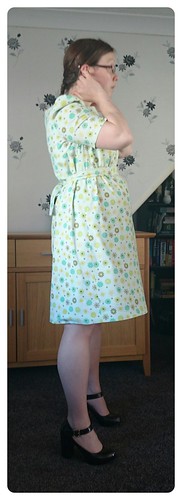
As you can see I've added a belt! After I'd made the dress I felt that it was very tent-like. I guess that may just be because my bump isn't big enough yet, but whatever the reason it looked more like a night-dress than a day dress. I made the belt from the same belt pattern piece that I got with my chambray shirt dress pattern that you can find here. I like the length and width of this belt, so why not re-use it?!

As I made the toile from lightweight white cotton, I then used it to fully line the dress as this cotton was a little too translucent in the light for my liking.

IMG_20140714_085619

I wasn't really sure if I liked this dress, so today was the first time that I had worn it. I didn't fall out with the pattern at all whilst I was making it, so there's no bad vibes to it. As I said, I made very little adjustment to it, which really saves a lot of time. I just wasn't sure if the fabric that I had chosen was really 'me', but now I see these pictures I'm actually thinking it's not too bad after all!

Monday, 7 July 2014

Maternity jeans refashion

Good morning! Did you have a nice weekend? I had a wonderful weekend! I spent most of it relaxing, which was most excellent. Saturday was almost a complete write off. I'd looked outside, concluded that the weather wasn't good enough to leave the house and spent most of the day sewing and watching Stargate!

Actually, in a sense, Saturday was actually very productive. I completed BHL's Polly top, along with modifications for my growing tummy, however as I had put it over my Dressmaker's dummy I forgot all about it and so I'm not going to talk about that one today! I also cut a hand towel in half, added some binding down the raw edge and ta-da I now have two small towels for use in the kitchen. I'd have taken photo's, but in reality it looks even more mundane than I've described!!!

Then I finally got round to modifying some maternity jeans that I bought from eBay. I'd received 2 in the listing, both faded black, one with 'over the bump' style band and the other with the 'under the bump' style band. I did not like the under the bump style at all. after trying them on I found that they made me look like I had a muffin top and the band was quite tight and stiff which kinda made them uncomfortable to wear. So, I had to do something about that.

'Under the bump' style waistband

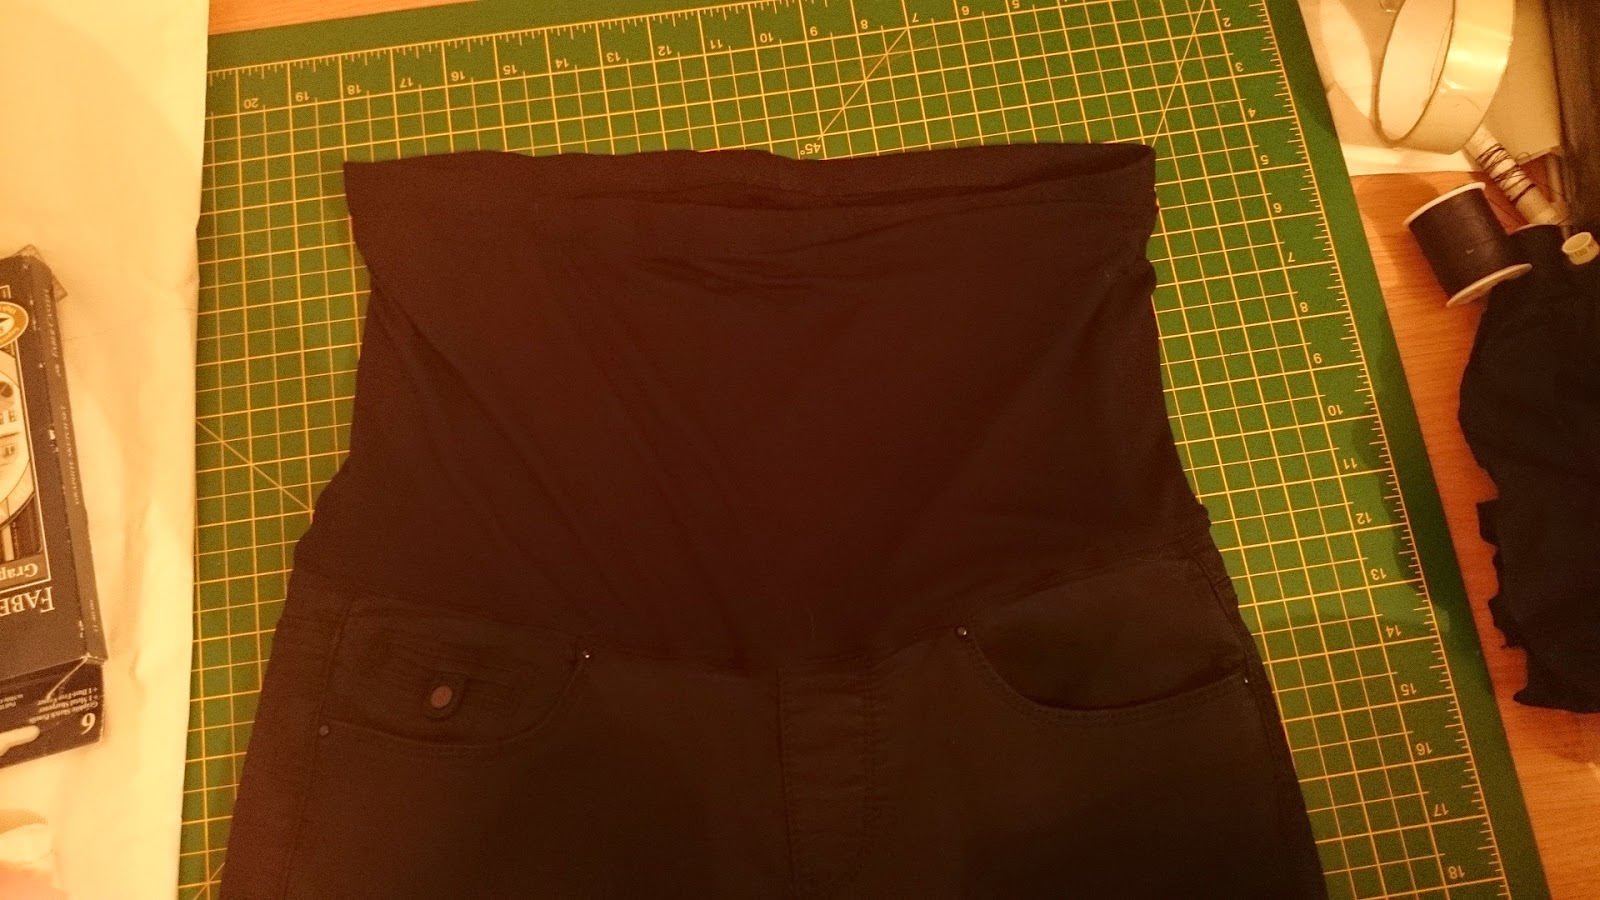
I have a couple of pairs of blue jeans with the over the bump style band and upon closer inspection I thought that I'd have no problem at all duplicating this style of band. All I needed was a seam ripper, some thread and some soft black jersey material. So first of all I removed that nasty waistband:


It came off easy enough, but there were many layers of stitching keeping it all together. They'd used a thick band of elastic and covered it with some thick jersey, each layer stitched individually to the jeans.

Then I measure the waistline of the jeans and my bump and cut out a large rectangle of jersey material. The jersey that I used was a 2 way stretch, so I made sure that it stretched horizontally and not vertically to accommodate a growing bump. As I was going to be doubling the band up I'd made it twice as big as I'd needed it and stitched in the elastic half way down the seamed side and then folded over so that the raw edges could be attached to the jeans. For some extra security I folded the jersey over the elastic waistband again and stitched in place with a zig zag stitch.


I don't think this picture is very clear with it all being black, but it now looks like the waistband of a pair of leggings. I then stitched right sides together the front layer of the jersey to the waist of the jeans, then folded the raw edge of the inner layer of jersey and pinned it to the inside so that no raw edges of jeans are exposed and stitched in place from the right side layer, through the denim so that it would catch the inner layer. I used my stretch stitch for this for extra durability.


I think they turned out pretty well and they are sooooo comfy. Obviously not the most attractive but the bump band will always be covered by a top of some description! But... can you see how faded the jeans are? They look more like grey jeans than black. So I bought some Dylon renovator to have a go at returning them to black. I bought this one from the Quilted bear on Amazon for £4.30 inc p&p.


I've never tried dying any of my clothing before, so this was a bit of a test for me. You use one sachet for up to 300g of clothing and both sachets for up to 600g. The jeans weighed in at just over 300g so I decided to go for just the one sachet. I also added salt like it suggests for really faded items. The instructions on the back are pretty comprehensive. So you chuck it in your washing machine on a normal 40'c cycle with detergent and at the end of the cycle you end up with black jeans! It's amazing, I couldn't believe my eyes as some of the reviews for this product were a little mixed. 


I must have taken at least 10 photo's of the finished product, messing around with my camera settings but I couldn't show you exactly how black they are. A mixture of the flash or the light in my sewing room was causing some issues and this is the best picture that I managed to take, so you'll have to take my word on this one - it worked.

Overall, I'm really pleased with the outcome of these. I now have what looks to be a brand new pair of black Maternity jeans with an 'over the bump' style band, for a fraction of the cost of a pair in the shops. I bought the two pairs of jeans from eBay at £6 inc p&p, the jersey was some from my stash that originally cost £3 p/m and half a packet of black renovator £2.15, so all in, it probably came to about £6-7. These maternity jeans would have cost £25 - £30 new and I've given them a new life!


Tuesday, 24 June 2014

Chambray Maternity Shirt Dress

Good Morning! Wow this is like my second post in two days, I must be on a roll...

I actually made this dress a couple of weeks ago, when my normal clothes started to feel snug. But, as soon as I'd made it, I felt it was too much of a tent to wear, even with the belt. Well we're a few weeks on now and I actually have a little something to put in it, so I didn't feel so self conscious to have some photo's taken in it.

IMG_20140624_091707

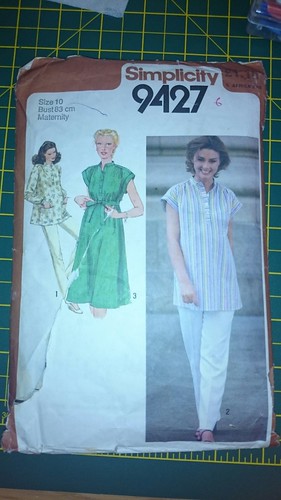
I'd found this pattern on eBay and it was my first maternity pattern. I think it's from the late 70's/early 80's. As I've previously mentioned, I'm not a fan of maternity patterns, of all the patterns I have seen I just haven't connected with. I'm not a fan of super stretchy cling to the bump clothes unless I'm being casual or lying around the house!
IMG_20140624_091525
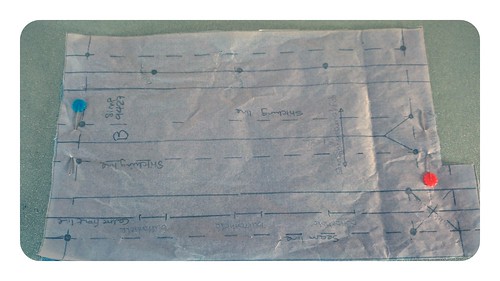
So I get the pattern out and trace off some of the pieces. This piece particularly scared me. So I thought I'd better trace it before I messed it up! However, I stuck to the instructions and you know, it didn't really turn out that bad. If you hadn't guessed it, this is the piece for the button placket at the front:

DSC_0324

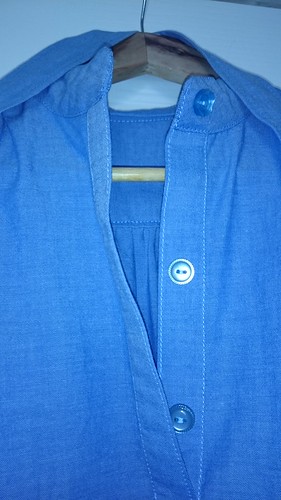
Notice I didn't bother with the buttonholes, I decided I probably wouldn't use them anyway. The only reason I put the buttons on was to stop it from looking too much like scrubs. This was the first comment that Barry made when I'd finished it - he's such a charming man at times!
IMG_20140624_092414
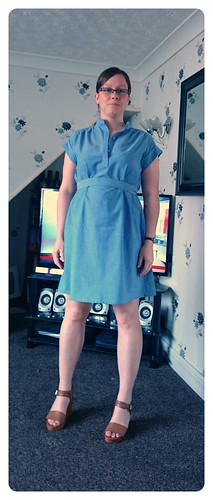
Tada! This is the finished dress. I think it goes really well with my new Clarks sandals, that I must say are super comfy for high heels.

IMG_20140624_092309IMG_20140624_092130IMG_20140624_092239
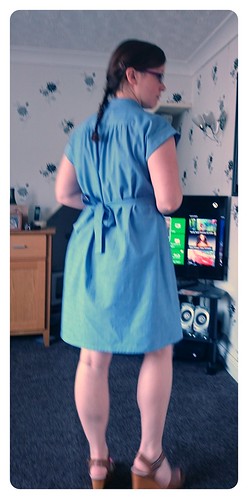
I do quite like the gathers at the shoulders and below the yoke at the back. Without the belt it looks like a tent, but once the belt is on I think it kinda looks cute with all the gathers flowing down the back and the bow of the belt.

IMG_20140624_092058
(Gratuitous cat fight in the back ground)
Overall I'm quite happy with this dress. I still feel like it's a little big, but I'm sure I'll grow in to it. As it was my first maternity dress I didn't make any major adjustments because I wasn't even sure how it was going to turn out. I did however, shorten the dress pattern pieces by about 8 inches, as this was obviously made for a giant and not the teeny tiny 5'3" girl that I am!

Monday, 23 June 2014

Centaurée dress - Deer and Doe

Did everyone enjoy the gorgeous weather at the weekend?

After completing some driving duties on Saturday and expecting to be working on the Sunday too, the boss said that due to the work being carried out on the Sunday (involving CS gas!) if I don't want to come in I don't have to. How on earth could I pass that opportunity up? Usually when it's a weekend in, you have to be in for the full weekend. Lucky me!

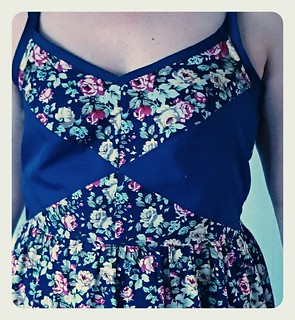
So, I knew this was a perfect opportunity to finish off my newest dress. Literally the minute Deer and Doe advertised their new dress I was in there buying it. Looking at the pictures and the description I thought that this could be quite an interesting challenge, after all, how many bodice patterns are constructed with what appears to be triangles?

IMG_20140623_092246

But, despite my preconceptions, it was actually quite easy to construct. Easier than princess seams, that was for sure, there was no easing required, so it came together really quickly.

IMG_20140623_092055 IMG_20140623_092134IMG_20140623_092027
I would say, however, that I'm not completely happy with the fit of the bodice. But, this is not a maternity pattern, and so I had decided to go up a couple of sizes in order to accommodate my 'in between' bump. I'm not small enough to fit into most of my regular clothes any more (especially not jeans). However, I'm a little on the small side for maternity clothes. 
  
IMG_20140623_091846

You can just about see my bump here! I've actually got a few pairs of maternity jeans, because it's just not practical to wear dresses all of the time, the 'under the bump' pair are a lot more snug than the 'over the bump' pair, but I'm finding that the over the bump style is a lot more comfortable even if I spend half of my time hoicking them up!

IMG_20140623_091955

You can see here I have a little extra under the bust, with the creases. These pictures were taken this morning and I do find that first thing on a morning I'm at my smallest, so towards the end of the day the dress actually looks as if it fits a little better.

I don't know if you noticed, but I used shop bought bias binding. I kinda regret this now. I think I went for larger than I should have and so the straps don't sit right at the front. So, instead of letting them sit straight up, (which made them look a bit odd) I decided to allow them to cross, which allowed them to sit flat. Next time I make this dress I will be making my own bias tape from the instructions!

IMG_20140623_091924

All in all, I'm really pleased with how this dress has turned out. Even though the fit is a little loose and the bias tape isn't quite the right size. As I grow, I think it will fit a little better and I'm hoping I can wear it for most of the summer. I will definitely be making it again, but I think I'll wait until next summer!

Tuesday, 10 June 2014

Jeans re-fashion and a Stripey dress

Good Morning! Posts are getting few and far between, some days I feel like I've lost my sewing mojo and others I realise that I am just to tired to get in to it. But, over the weekend I think I've managed to get it back and I managed to finish off 4 cushion covers, re-fashion a pair of jeans, hem a dress that's been in the making for some time and fully complete my first Maternity dress - yes the reason I've been so exhausted!

I started this dress prior to finding out about my pregnancy and before my waist had started to expand. I should have seen it coming, I'd made a couple peplum tops, one out of my favourite vogue pattern and the finished product felt just a little too snug. I thought it was due to the stiff fabric. Then I started to make this dress using the bodice from Vogue 8815, which from the previous result I decided to make the seam allowances a little smaller and reduced to 10mm. It still didn't feel right and I looked rather dumpy in it. In hindsight I would have thrown it in the UFO box to complete at a later date! I still need to complete the lining, but I'm not really all that interested in it now I can't wear it!!

DSC_0322 DSC_0323

Look at that, I even under-stitched the arm holes, you have no idea how proud I was of those! I will put the dress away and return to it next year, with the intention of wearing it next summer.

I also had a go at re-fashioning an old pair of Etam jeans. I'd previously seen a post from Andrea where she'd re-fashioned jeans from being boot cut to skinny. I've been itching to try this on these jeans for some time now and seeing as I also wanted to turn them in to maternity jeans I thought I might as well give it a go.

DSC_0320DSC_0321

I was really pleased with the boot cut to skinny adaptation, however, I do not like the little triangles of jersey I inserted at the side seams to adapt them for use in maternity. I think I went a little too far down the leg, so unless I wear long tops they are a little too obvious. I'm also not quite big enough for them so a belt would be required. I think I'll have to go back to my sewing desk with these and have a re-think!

I've also completed a maternity dress, but I want to model that one so watch this space...

Wednesday, 28 May 2014

Jumper to Cardi

Where on earth did that sunshine go? Not so long ago we had the most glorious weather and now it's back to rain. Uri the friendly security guard from the Ukraine always says that I shouldn't complain, it's beautiful and that it's 'Mary Poppins Country'! He's right, I shouldn't complain, he's had to cancel his holiday home for fear of not being able to come back. Despite all this, he must be the most upbeat Security Guard I have ever met. He's always so happy regardless of what's going on in his life, which is amazing because I (like probably a lot of people) catch his happiness every time I speak to him. Some people are just so wonderful aren't they?!

Again, I haven't really been sewing much. I have, however, got something to share today! A few weeks back Andrea  posted about a cardi that she had made by re-fashioning a jumper. I was so thrilled with her finished product and her simple explanation that I just had to have a go. I rarely wear jumpers as they just feel so restrictive and when you take them off they always mess your hair up, so having more cardi's in my wardrobe would be a brilliant idea for me.

So, I set about looking at jumpers that I had that I could modify. Unfortunately most of my jumpers were a bit past saving. So, whilst I was getting my car serviced I had a little walk into town to see what I could get in the charity shops. This was a big fat nothing, there were no jumpers worth saving, mostly all worn out or not very nice material.

Then, I found this little beauty in the Tesco's sale:
IMG_20140528_115732

So I cut it right down the middle and attached some pre-made bias binding that I'd bought from Boyes.
IMG_20140528_115800

I had a bit of trouble putting in the button holes and I have to admit I need a little more practice on these as a couple of them aren't as straight as I would have liked. The main issue was that my machine did not like the knitted material and failed to want to move to create the buttonhole. As a result I ended up with a nasty knot of thread and a bit of a jam! After two failed attempts I tried a little tissue paper over where I wanted the buttonhole and it worked a treat:

IMG_20140528_115655

Once I'd gotten the buttonholes all stitched I then simply tore away the tissue. It came away with no problems at all and any remaining tissue will be melted away in the wash anyway.

Here's the finished cardi:

IMG_20140528_115354 IMG_20140528_115558

What do you think to the little heart shaped buttons? I was struggling to find matching buttons in my stash, so a quick look on eBay and I just couldn't resist them. They're just so cute!

I absolutely love my new cardi, I wore it to work yesterday and it's so comfy. I could take it off and put it on anytime I liked without disturbing the hair! 

Thursday, 22 May 2014

It's been a long time...

Hola people! It's been a long time since I last posted. In fact it feels like forever! I was sewing up a lovely blue and white striped dress ready for the glorious sunshine that I'm sure we're going to get this year. But, mid dress I've put it on my dress form and not picked it back up again. I've been sooooo exhausted. It's not like I've done no sewing at all, there's been a couple of repairs and a friend asked me to let out a dress for her. You know, quick wins.

There's also the 'Name tag swap' that I was telling you about before, this also feels like an age ago. But I have just received mine a couple of days ago and I was so excited that I just had to blog about it!! Here it is:

DSC_0284 DSC_0285 DSC_0286

How totally cute is it! I love how Andrea has sewn a little kitty into the button, how absolutely divine! They say that 'the Devil's in the details' and it really is, I didn't even notice the kitty to begin with. There's so many wonderful things to say, but you can see for yourself!

Hopefully, very soon I will have the energy to get back into sewing properly. I have a list of projects I want to do and they are piling up pretty rapidly so I need to get my skates on! xxx

Wednesday, 23 April 2014

The Crazy Cat Lady Dress

Good Afternoon! I hope you had a wonderful Easter. I know I did. I got to finish off a dress, start a new one and I got to see family too. How wonderful is that?

I've been trying to post this for a few days now, but unfortunately, the Blogger app on my phone no longer works. I've tried uninstalling and re-installing, I've soft reset my phone and it still wants to pop up with errors about the app stopping so I've given up. I didn't really use it for actually posting actual content anyway, that would be crazy as these new fangle touch screen jobbies aren't very nice to use to type lots of words out on. What I did use it for was a quick way to upload the photos to my blog, prior to adding the words. I suppose it was kinda a lazy thing to do anyway. So here's to a renewed relationship with Flickr!

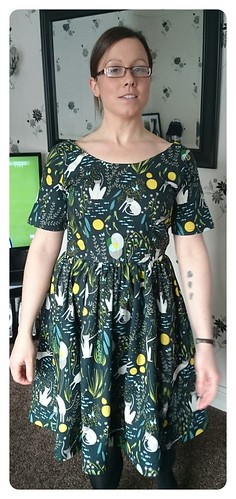
So, I finished my Crazy Cat Lady dress just in time to wear for our dinner party with Barry's Brother, partner and ickle baby on Sunday. I certainly did feel like a domestic goddess with my hand made dress and the dinner that I cooked up from the Hairy Biker's diet cookbook. (I made their beef in red wine and I thought it was rather delish!)
IMG_20140422_152301

I do have a little bit of a confession to make.... I am a big fat copy cat! Yup, I saw a dress that Sarah from a million dresses had made and I just had to have one of my own! Sarah's Christine Haynes version can be found here.

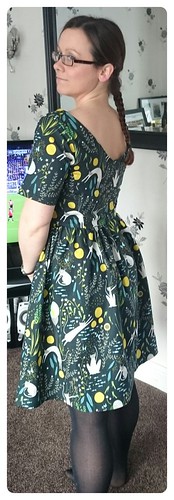
This is another Elisalex from By Hand London. I just love the low back, I feel so classy wearing it!

IMG_20140422_152239IMG_20140422_152137IMG_20140422_152201

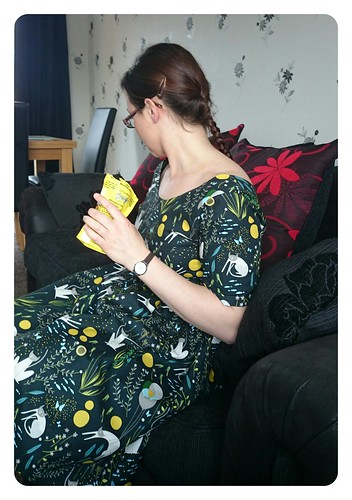
I used Andover fabric from their Catnap collection by Lizzy House. I think it's possibly one of my favourite fabrics. For quilting cotton it's surprisingly soft and I just can't resist anything to do with cats!

IMG_20140422_152334
I am giving my cat these treats, I swear it - I'm not that much of a crazy cat lady! I love how the treat packet almost co-ordinates with my dress though...