Showing posts with label princess seams. Show all posts

Wednesday, 23 April 2014

The Crazy Cat Lady Dress

Good Afternoon! I hope you had a wonderful Easter. I know I did. I got to finish off a dress, start a new one and I got to see family too. How wonderful is that?

I've been trying to post this for a few days now, but unfortunately, the Blogger app on my phone no longer works. I've tried uninstalling and re-installing, I've soft reset my phone and it still wants to pop up with errors about the app stopping so I've given up. I didn't really use it for actually posting actual content anyway, that would be crazy as these new fangle touch screen jobbies aren't very nice to use to type lots of words out on. What I did use it for was a quick way to upload the photos to my blog, prior to adding the words. I suppose it was kinda a lazy thing to do anyway. So here's to a renewed relationship with Flickr!

So, I finished my Crazy Cat Lady dress just in time to wear for our dinner party with Barry's Brother, partner and ickle baby on Sunday. I certainly did feel like a domestic goddess with my hand made dress and the dinner that I cooked up from the Hairy Biker's diet cookbook. (I made their beef in red wine and I thought it was rather delish!)
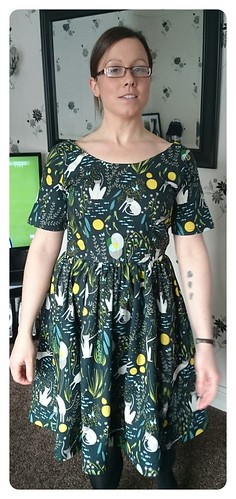
IMG_20140422_152301

I do have a little bit of a confession to make.... I am a big fat copy cat! Yup, I saw a dress that Sarah from a million dresses had made and I just had to have one of my own! Sarah's Christine Haynes version can be found here.

This is another Elisalex from By Hand London. I just love the low back, I feel so classy wearing it!
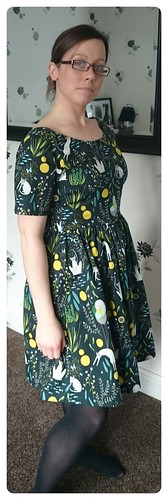
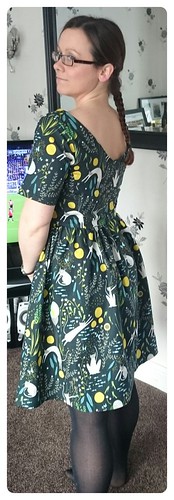
IMG_20140422_152239IMG_20140422_152137IMG_20140422_152201

I used Andover fabric from their Catnap collection by Lizzy House. I think it's possibly one of my favourite fabrics. For quilting cotton it's surprisingly soft and I just can't resist anything to do with cats!
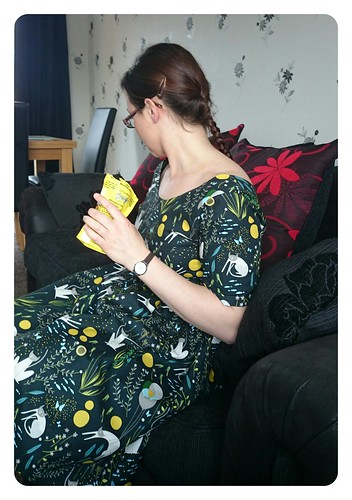
IMG_20140422_152334
I am giving my cat these treats, I swear it - I'm not that much of a crazy cat lady! I love how the treat packet almost co-ordinates with my dress though...

Thursday, 20 February 2014

The Elisalex project

It has been an eventful and busy week since I last posted. We now have a beautiful baby niece so we popped round to see the happy couple and our teeny tiny little Ivy. She's just amazing! Then we spent the weekend trying to complete the kitchen, but actually spent more time talking about it and buying the materials than actually finishing it. But it looks somewhere on the way now....

So, I haven't had much time for sewing and the time that I had, I spent making Elisalex muslins. Because everyone loves a frustrating project that never seems to want to fit! No, of course they don't. I almost gave up. In the end I managed to get there and now I'm so pleased. 

This is my happy face!
The first muslin that I made I cut a straight 10. This was a terrible fit, even worse than the cheapest RTW dress that I own. It was super tight around the waist and super baggy everywhere else. The neckline gaped, the back gaped and the bust was a little baggy. This is so odd because I've only just slimmed down to a size 10 and I even put on 5 pounds over Christmas that I'm very slowly shifting. So I pinned it up and re-drafted the bodice pieces. From my new measurements I graded it from a size 8 in the shoulders to a 10 in the bust and a 12 at the waist. I created another Muslin. This attempt was much better, but it still didn't fit well. I had to take more from the shoulders, which I just removed from the front and back center pattern pieces. I also had to remove a little off the shoulder pieces as there was way too much ease, giving me loads of crumply fabric around my armpits, but at the same time I had to add to the rest of the sleeves as they were so tight around my arms that it was pulling at the top of the bodice.

Fed up with all of the adjustments I decided to go ahead and cut my fabric. I knew what adjustments were needed and was pretty certain that this would achieve the required fit. 


This fabric I've had in my stash for at least 6 months. It's part of Joel Dewberry's Modern Meadow collection. I love it so much that I didn't want to use it! Unfortunately the pictures don't do it justice, I think this possibly might have something to do with the Burgers that I grilled last night, they left a sort of haze through the kitchen and sitting room and I think that's why we couldn't get any decent pictures of the fabric. I could have sacked it off and done it today, but I wore the dress yesterday and there's nothing like seeing a dress on an actual person.

As you can see, I didn't go with the original skirt in the pattern. The fabric just wouldn't have been stiff enough. So, instead, I opted for a skirt that I've already used from New Look Pattern 6824. The pattern calls for pleats, but I decided to go with gathers and I think it works quite well. I do like big skirts, I was considering using the skirt pattern from Butterick 9269, but I wanted an every day dress and I feel like the bigger the skirt the more of a special occasion it should be worn at. Plus they carry so much more bulk round the waist that I feel it necessary to wear a belt over it and I don't want to have to. Sometimes it's nice to be free of belts!

I'm very pleased now with the fit, and despite having to re-draft the bodice, I will definitely be making this dress again. 

Silly selfie time!

Sunday, 1 December 2013

Simplicity 6020

It has been a while, but I've finally got back in to sewing and created a Simplicity 6020. This is possibly the quickest, easiest dress I've ever made.

That's not to say that I made no mistakes. It all got a little confusing when it came to the lining, when I decided to stitch it to the wrong side on the neckline! 
 
The dress is constructed with front and back princess seams that run from the bodice down through the skirt, to make a fit and flare shape.


For some reason the side zip sits funny on the dummy, but it's not too bad when it's on. I went for a lapped zip to make it look neat and I was quite impressed with how it turned out considering it was my first.

The fabric was some that I'd picked up from Pauline's on Darlington Market for about £5 per meter and I lined it with purple anti static lining.


The back is in a lovely 'v' shape, showing a little bit of black.


I love the little flowers and I'm glad I went for purple lining rather than boring old black.


However, the camera on the iPad makes it look like I used black, but it's definitely a Cadbury's shade of purple. 

I wore the dress last night when we went out for a family meal and I felt like such a lady. I'm going to have to make another of these, but next time I'd make some amendments to the bodice, the shoulders were a little wide, so I had a little gaping on the chest neckline.


Monday, 24 June 2013

College project finished

College finished, but I still hadn't completed my dress. We probably spent to much time chatting! But seriously, when you have a class of people all fighting for the attention of one tutor, there were moments of standing around.

I finished the dress today, I'd left some hand stitching so I could get the rest of the complicated items done whilst I was at college.

This is definitely the best dress that I have made, however since starting college I've lost a bit of weight so it's a little more roomy than it should be, but I still think it looks pretty.

Sunday, 2 June 2013

Finished

My dress is finished! I wore it tonight to go it with the ladies and I really felt like a lady.

Friday, 31 May 2013

It's starting to look like a dress!

I had a rather productive night last night. I managed to re-sew the sleeve, attach the bodice lining and do the pleats on the skirt & skirt lining.

The pleats were a bit of a nightmare. I must have pinned and re-pinned several times. It was not obvious (to me) from the instructions how to do them. In the end, I ended up looking on Google images at other peoples interpretations! I still might change them, I'm not 100% on them.
Pleats, tailor's tacks and baste
Bodice and lining - looks rough!

Wednesday, 29 May 2013

Arrrggghhh sleeves!

I didn't spend long on my dress today. Getting the sewing kit out late doesn't bode well for an evening! So I decided to pt the sleeves on and no more.

It didn't really work out as planned. The first sleeve I messed up 3 times, which means un-picking the same section 3 times. It's still wrong. As you can see from the picture below, one sleeve has two nipped bits of fabric and the other has turned out OK (or will look more so once it has been pressed!).
Sleeves are not easy!!!
Right sleeve looking a little rubbish!

Wednesday, 22 May 2013

I've been busy tonight...

I made time tonight to get some more of my college project done. I started off constructing the bodice. This is kind of tricky, with the added ease, to ensure I didn't nip the fabric, so I tacked it with some yellow cotton first.

Bodice
I stitched all of the rest of the bodice together and then made a start on the skirt. I whizzed through the rear darts and then pinned the front pleats before tacking in place. You will see I've tacked the top and the bottom of the pleat to ensure it doesn't move out of shape whilst I'm constructing the dress.

Front skirt pleats
Rear skirt slit seam
The back slit of the skirt was a bit fiddly, I put in the slit seams first and then sewed from the top notch all the way round. Having a foot with a guide attached really helped with the fine seam on the slit.
I've placed the bodice on top of the skirt to see how it will look together, mostly because I'm impatient and I would like to see how the pattern looks together!

Bodice placed over skirt