Showing posts with label sleeves. Show all posts

Wednesday, 23 April 2014

The Crazy Cat Lady Dress

Good Afternoon! I hope you had a wonderful Easter. I know I did. I got to finish off a dress, start a new one and I got to see family too. How wonderful is that?

I've been trying to post this for a few days now, but unfortunately, the Blogger app on my phone no longer works. I've tried uninstalling and re-installing, I've soft reset my phone and it still wants to pop up with errors about the app stopping so I've given up. I didn't really use it for actually posting actual content anyway, that would be crazy as these new fangle touch screen jobbies aren't very nice to use to type lots of words out on. What I did use it for was a quick way to upload the photos to my blog, prior to adding the words. I suppose it was kinda a lazy thing to do anyway. So here's to a renewed relationship with Flickr!

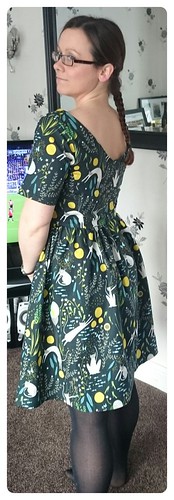
So, I finished my Crazy Cat Lady dress just in time to wear for our dinner party with Barry's Brother, partner and ickle baby on Sunday. I certainly did feel like a domestic goddess with my hand made dress and the dinner that I cooked up from the Hairy Biker's diet cookbook. (I made their beef in red wine and I thought it was rather delish!)
IMG_20140422_152301

I do have a little bit of a confession to make.... I am a big fat copy cat! Yup, I saw a dress that Sarah from a million dresses had made and I just had to have one of my own! Sarah's Christine Haynes version can be found here.

This is another Elisalex from By Hand London. I just love the low back, I feel so classy wearing it!

IMG_20140422_152239IMG_20140422_152137IMG_20140422_152201

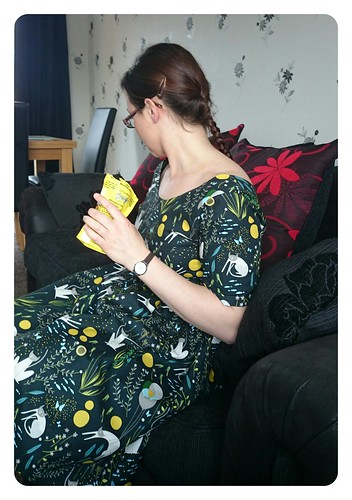
I used Andover fabric from their Catnap collection by Lizzy House. I think it's possibly one of my favourite fabrics. For quilting cotton it's surprisingly soft and I just can't resist anything to do with cats!

IMG_20140422_152334
I am giving my cat these treats, I swear it - I'm not that much of a crazy cat lady! I love how the treat packet almost co-ordinates with my dress though...

Tuesday, 15 April 2014

The First Lady Peplum

So I mentioned yesterday that I had another Peplum on the way, not wanting to disappoint, I made sure that I wore it today so I could get a few snaps before I left for work.

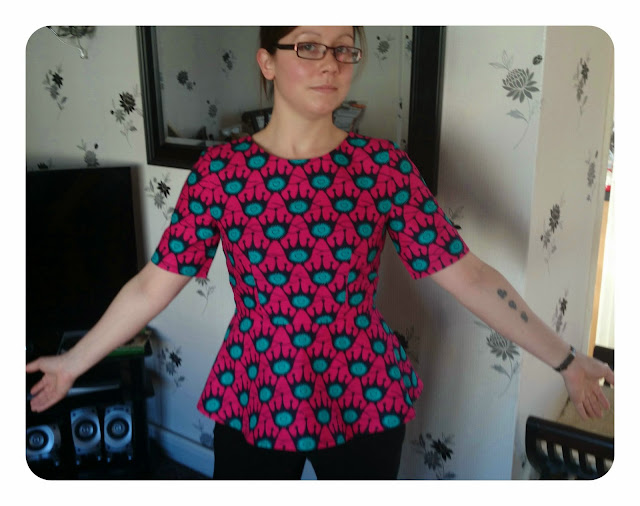
After the Great British Sewing Bee finished last week, I thought it was about time that I made myself an African Wax print Peplum, I was so inspired by Chinelo Bally's Peplums that I just had to have one! I was absolutely gutted that she didn't win, but Heather really pulled it out of the bag with her final dress.


So, first things first I had to go and find some African Wax print material. This was a little tricky. I wanted some similar to the one she used above. But everything that I could find had massive prints, that I could only really use in a dress or long skirt. I ended up with this bright bright pink fabric from eBay.


It's a little out of my comfort zone to use such a bright colour. I wasn't even sure I could wear it let alone pull it off. But I thought go on, let's just give it a bash and see what I end up with!
I used my favourite Peplum pattern, Vogue 8815. It's so easy to construct, so I made it in almost no time at all. The bodice consists of 2 darts in the front and 4 on the back, I don't think you can get any more simple than that for a bodice.


The fabric is quite stiff and has almost no give in it at all. So, as a result it feels quite snug, but it's not uncomfortable until I try and raise my hands above my head! I'm thinking I may take the seams out a little, just to give a little more ease. My previous version of this top was made from some quilting cotton and that's no where near as stiff as this.

It was quite difficult trying to pattern match with this fabric as the pattern doesn't quite have the same spacing all the way round. I only realised this after cutting the fabric, so in places it doesn't quite match where I feel it should.

The resulted garment is growing on me and I think the more I wear it, the more I'll like it. I just need to be more comfortable with bright colours. After all, before I started to make my own clothes, most of my wardrobe was shades of grey and black so I think I'm being rather brave don't you?!

Monday, 7 April 2014

My first Re-fashion!

I'm really excited to tell you that I have completed my first re-fashion! This is something that I have never delved in to, I'm really not sure why as it's a brilliant way of recycling, so this is the first of many.

This all started when I put my name down for the 'Name Tag Swap' that Rachel from House of Pinheiro is organising on her blog. Basically you have to create a name tag for your new buddy and they have to make one for you. Name tags must be received by 9th May and Rachel has very kindly pinned some for inspiration here.

My buddy is the amazing Andrea from Little did you know. I've had an extremely thorough stalk read through her blog to get some ideas for the name tag. Andrea's main interest is in re-fashioning clothes, something that I had never really considered trying. So I thought what better way to get to know someone than to walk a mile in their shoes?!!

I don't currently have any clothes that I could re-fashion. Mainly because I often donate them to charity. Now, in my little town, there are only 3 charity shops to choose from. I spent a Saturday afternoon looking in them and not one thing jumped out at me as something that I'd like to re-fashion. How the heck does Andrea find all of these gems?? 

I gave up. I went to Tesco's for some tights and I came out with this as well:


Slightly hideous, it was a size 18 shapeless 3/4 sleeve t-shirt. I think I saw the sale rack and out of desperation grabbed it because it was only a fiver. Looking at this picture it really is even more hideous than I remember! 

As soon as I got it home I knew exactly what it would become. I bet you can't guess!! :-P

I did cheat a little. OK a lot. First of all I un-picked the side seams and removed the sleeves. I then took out my traced pattern pieces from my favourite Peplum (yep I'm soooo predictable) pattern, Vogue 8815, and placed them over the t-shirt like so: 

 
I wanted to keep the neckline as I liked the pink piping and it sat fine on my neck. So I folded the t-shirt and placed the paper pattern to match with the fold and shoulder seams.

Yep, I thought I was pretty darn clever for doing that!

Unfortunately, the peplum pattern pieces were a little too big and I didn't quite have enough fabric left to make them. So, what I did was make them a little bit shorter. The T-shirt also came with a folded piece of fabric as the hem, I detached it carefully and used it to add length to the peplum.

Folded fabric hem
All in all I think it took me about 4 hours to make. Most of the time was spent un-picking the seams of the original t-shirt. I could have cut them off, but then I wouldn't have quite had enough fabric, which you can see on the picture at the top of the page showing where the front bodice pattern piece ends.

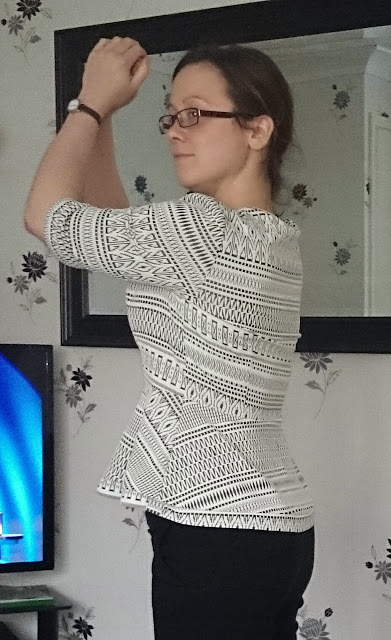
Unfortunately I did not pattern match the fabric. There wasn't enough, if there had been enough though I would not have been able to keep the neckline, because like a lot of RTW clothes the manufacturer hadn't matched the pattern between the front and back either!


What a silly pose to show off my lack of pattern matching!!

I love my new top, it fits so much nicer than any RTW top I could buy and for a fiver it was an absolute bargain. I also have a new appreciation of re-fashioning. It's a very painstaking process and I have absolutely no idea how Andrea has the patience to do it so often. But regardless, it's very rewarding and I will definitely be trying it again soon, once I have actually made Andrea's Name tag that is!
Wednesday, 12 March 2014

OUI! It's another Peplum!

I've done it again, I think I'm a little bit obsessed with Peplums at the moment! But I have to say, although I love all my Peplums equally, this one is definitely my favourite.

I used Vogue pattern V8815 and I actually started it well over a week ago. I remember it quite clearly because Barry had gone for a day session in Newcastle for a leaving do. (The guy wasn't even leaving he's just moving to another team a few pods up, but that clearly gives an excellent excuse for a piss up!) 

So, as I was home alone, I decided this was the perfect opportunity to move the dining table in front of the TV so that I could set up all of my sewing whilst watching BSG: Blood and chrome that I'd recorded off the telly a couple of weeks before!

What a mess!! But whilst the cat's away...

The pattern is wonderfully thought up and so easy. It went together like a dream, however, surprisingly enough it came with no facing pieces. But that's no big deal, it gave me the perfect opportunity to draft my own! After tracing out the main pattern pieces, making adjustments for my size, I then took another piece of tissue, placed it over my pattern pieces and created what I now think is the best facing ever! It's sort of a semi-lining that goes all the way round the neck line and around the arm holes. It works an absolute treat, that design with what I now know is called 'under stitching', prevents that horrible flappy facing problem.

No flappy facing for me.

You could use bias binding around the neckline, but I like the clean lines that I've produced without it.


The fabric that I used is a quilting cotton in Glimma by Lotta Jansdotta, which I got on sale at Guthrie and Ghani. For the bow at the back I used some ribbon from Boyes. You can't beat good old Boyes for little bits like that, especially when you make a last minute decision.
This fabric probably wasn't the best choice for this top. There was very little hope of me pattern matching with all the wave lines. I'd match it in one place but the then rest is out, so I just had to roll with it. This is exactly the fabric that I had in mind for this pattern, so the lines had to lie where they have.

I wore this top on Friday for Barry's birthday dinner, however we got very (very very very) tipsy and no photo's were taken of the top. So, as I'd washed and ironed it again over the weekend I thought I'd wear it to work today, which gave us an excellent opportunity to get pictures.

Overall I totally love this top, it's the right shape with the right pattern and it fits beautifully. (Or at least I think it does!!) I'm definitely going to make more. 

Thursday, 20 February 2014

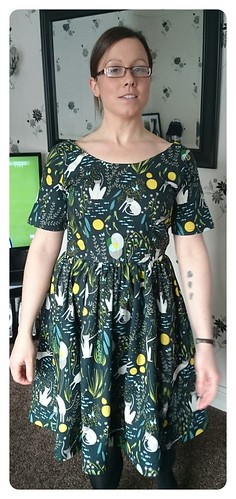
The Elisalex project

It has been an eventful and busy week since I last posted. We now have a beautiful baby niece so we popped round to see the happy couple and our teeny tiny little Ivy. She's just amazing! Then we spent the weekend trying to complete the kitchen, but actually spent more time talking about it and buying the materials than actually finishing it. But it looks somewhere on the way now....

So, I haven't had much time for sewing and the time that I had, I spent making Elisalex muslins. Because everyone loves a frustrating project that never seems to want to fit! No, of course they don't. I almost gave up. In the end I managed to get there and now I'm so pleased. 

This is my happy face!
The first muslin that I made I cut a straight 10. This was a terrible fit, even worse than the cheapest RTW dress that I own. It was super tight around the waist and super baggy everywhere else. The neckline gaped, the back gaped and the bust was a little baggy. This is so odd because I've only just slimmed down to a size 10 and I even put on 5 pounds over Christmas that I'm very slowly shifting. So I pinned it up and re-drafted the bodice pieces. From my new measurements I graded it from a size 8 in the shoulders to a 10 in the bust and a 12 at the waist. I created another Muslin. This attempt was much better, but it still didn't fit well. I had to take more from the shoulders, which I just removed from the front and back center pattern pieces. I also had to remove a little off the shoulder pieces as there was way too much ease, giving me loads of crumply fabric around my armpits, but at the same time I had to add to the rest of the sleeves as they were so tight around my arms that it was pulling at the top of the bodice.

Fed up with all of the adjustments I decided to go ahead and cut my fabric. I knew what adjustments were needed and was pretty certain that this would achieve the required fit. 


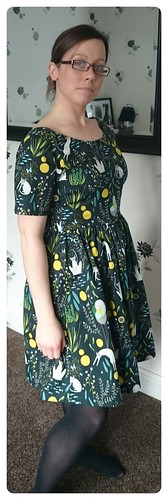
This fabric I've had in my stash for at least 6 months. It's part of Joel Dewberry's Modern Meadow collection. I love it so much that I didn't want to use it! Unfortunately the pictures don't do it justice, I think this possibly might have something to do with the Burgers that I grilled last night, they left a sort of haze through the kitchen and sitting room and I think that's why we couldn't get any decent pictures of the fabric. I could have sacked it off and done it today, but I wore the dress yesterday and there's nothing like seeing a dress on an actual person.

As you can see, I didn't go with the original skirt in the pattern. The fabric just wouldn't have been stiff enough. So, instead, I opted for a skirt that I've already used from New Look Pattern 6824. The pattern calls for pleats, but I decided to go with gathers and I think it works quite well. I do like big skirts, I was considering using the skirt pattern from Butterick 9269, but I wanted an every day dress and I feel like the bigger the skirt the more of a special occasion it should be worn at. Plus they carry so much more bulk round the waist that I feel it necessary to wear a belt over it and I don't want to have to. Sometimes it's nice to be free of belts!

I'm very pleased now with the fit, and despite having to re-draft the bodice, I will definitely be making this dress again. 

Silly selfie time!

Wednesday, 29 May 2013

Arrrggghhh sleeves!

I didn't spend long on my dress today. Getting the sewing kit out late doesn't bode well for an evening! So I decided to pt the sleeves on and no more.

It didn't really work out as planned. The first sleeve I messed up 3 times, which means un-picking the same section 3 times. It's still wrong. As you can see from the picture below, one sleeve has two nipped bits of fabric and the other has turned out OK (or will look more so once it has been pressed!).
Sleeves are not easy!!!
Right sleeve looking a little rubbish!

Tuesday, 28 May 2013

Bank holiday project

I should have been finishing the T- shirt I started 2 weeks ago, but I've lost interest! It doesn't look very nice as T-shirt, looks more like part of a cosy pajama set.

So instead of finishing this, I started a dress for our girls night out on Saturday night. I'm using New Look pattern 6824, the same pattern that I'm using for my college project. However, this time I'm doing the flared skirt rather than the fitted and I've taken 10 cm off the bottom. The bodice has princess seams and I've picked the higher neckline design as I don't want to look too tarty with the short skirt. It's also going to have capped sleeves.

I've decided to try a bright red poly-cotton fabric that a bought from Amazon and I'm lining it with regular anti static lining. I wasn't sure if this would work as it look more like tablecloth fabric! But I have made up the bodice and tried it on, it looks petty cute.

I also bought some long pins with heart shaped heads and I love them! I don't need to use as many, but they are easier to remove. (note to self: buy some more!)
Putting in some tailor's tacks
Tacked princess seams 


Super cute long pins with heart- shaped heads.
Soooo easy to remove whilst sewing