Showing posts with label peplum. Show all posts

Tuesday, 15 April 2014

The First Lady Peplum

So I mentioned yesterday that I had another Peplum on the way, not wanting to disappoint, I made sure that I wore it today so I could get a few snaps before I left for work.

After the Great British Sewing Bee finished last week, I thought it was about time that I made myself an African Wax print Peplum, I was so inspired by Chinelo Bally's Peplums that I just had to have one! I was absolutely gutted that she didn't win, but Heather really pulled it out of the bag with her final dress.


So, first things first I had to go and find some African Wax print material. This was a little tricky. I wanted some similar to the one she used above. But everything that I could find had massive prints, that I could only really use in a dress or long skirt. I ended up with this bright bright pink fabric from eBay.


It's a little out of my comfort zone to use such a bright colour. I wasn't even sure I could wear it let alone pull it off. But I thought go on, let's just give it a bash and see what I end up with!
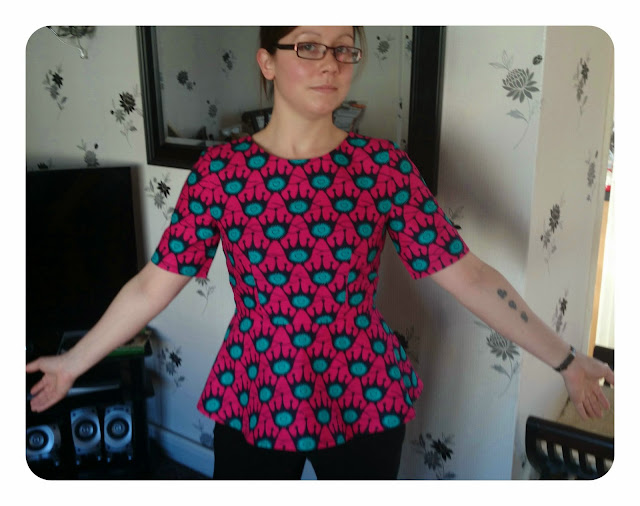
I used my favourite Peplum pattern, Vogue 8815. It's so easy to construct, so I made it in almost no time at all. The bodice consists of 2 darts in the front and 4 on the back, I don't think you can get any more simple than that for a bodice.


The fabric is quite stiff and has almost no give in it at all. So, as a result it feels quite snug, but it's not uncomfortable until I try and raise my hands above my head! I'm thinking I may take the seams out a little, just to give a little more ease. My previous version of this top was made from some quilting cotton and that's no where near as stiff as this.

It was quite difficult trying to pattern match with this fabric as the pattern doesn't quite have the same spacing all the way round. I only realised this after cutting the fabric, so in places it doesn't quite match where I feel it should.

The resulted garment is growing on me and I think the more I wear it, the more I'll like it. I just need to be more comfortable with bright colours. After all, before I started to make my own clothes, most of my wardrobe was shades of grey and black so I think I'm being rather brave don't you?!

Monday, 14 April 2014

If I carry on this way, I'm in serious danger of becoming a one trick pony!

I've done it again, it's another Peplum! It's also not the first of the week as I have another on the way!!! If I'm not careful I certainly will end up a one trick pony. But I so lurrrrve the Peplum. I have such a boy figure that it helps me fake a shape and it also hides my tummy a little, so it just perfect for me. 


I've been lusting over this pattern for a while now, it's Simplicity 1590, which is a vintage Peplum blouse. Simplicity are currently selling their patterns at half price, so this was the ideal time for me to get my hands on it. Call me a cheapskate, but I hate paying full price for patterns these days, unless they are really special.

"You will sit down"

Unfortunately I managed to mess up a little on the measurements whilst I was making this blouse as I have made it a tiny bit snug around the waist. (D'oh) There's not much ease left so you can see it pulling a little. Yup, that's what you make toiles for! 
But that's not really much of a concern for me as I'd made it out of some cheap broderie anglais that I bought from Boyes, so even if I hadn't ever worn it ever again it wouldn't have been so much of a loss.

A close up, as you can't see the detail in the photos.

I was thinking this morning as I put it on that I hated it. I thought this will be the first and last time I ever wear it ever. But looking at the pictures, maybe it's not so bad after all? In fact maybe it's even a little bit cute? All in all it took 5 hours to make, I couldn't believe how quickly it came together. OK, so 5 hours isn't so speedy, but I like to take my time! 

This is definitely a blouse that I will make again, but next time a few adjustments need to be made. This time I traced a 10 and graded out to a 12 at the waist, but next time I think I will trace a 10 and grade down to half way between a 12 and a 14 at the waist. I can see it in all kinds of fabrics, but mostly I have my eye on Moda's 'April showers' collection for the next one!

Monday, 7 April 2014

My first Re-fashion!

I'm really excited to tell you that I have completed my first re-fashion! This is something that I have never delved in to, I'm really not sure why as it's a brilliant way of recycling, so this is the first of many.

This all started when I put my name down for the 'Name Tag Swap' that Rachel from House of Pinheiro is organising on her blog. Basically you have to create a name tag for your new buddy and they have to make one for you. Name tags must be received by 9th May and Rachel has very kindly pinned some for inspiration here.

My buddy is the amazing Andrea from Little did you know. I've had an extremely thorough stalk read through her blog to get some ideas for the name tag. Andrea's main interest is in re-fashioning clothes, something that I had never really considered trying. So I thought what better way to get to know someone than to walk a mile in their shoes?!!

I don't currently have any clothes that I could re-fashion. Mainly because I often donate them to charity. Now, in my little town, there are only 3 charity shops to choose from. I spent a Saturday afternoon looking in them and not one thing jumped out at me as something that I'd like to re-fashion. How the heck does Andrea find all of these gems?? 

I gave up. I went to Tesco's for some tights and I came out with this as well:


Slightly hideous, it was a size 18 shapeless 3/4 sleeve t-shirt. I think I saw the sale rack and out of desperation grabbed it because it was only a fiver. Looking at this picture it really is even more hideous than I remember! 

As soon as I got it home I knew exactly what it would become. I bet you can't guess!! :-P

I did cheat a little. OK a lot. First of all I un-picked the side seams and removed the sleeves. I then took out my traced pattern pieces from my favourite Peplum (yep I'm soooo predictable) pattern, Vogue 8815, and placed them over the t-shirt like so: 

 
I wanted to keep the neckline as I liked the pink piping and it sat fine on my neck. So I folded the t-shirt and placed the paper pattern to match with the fold and shoulder seams.

Yep, I thought I was pretty darn clever for doing that!

Unfortunately, the peplum pattern pieces were a little too big and I didn't quite have enough fabric left to make them. So, what I did was make them a little bit shorter. The T-shirt also came with a folded piece of fabric as the hem, I detached it carefully and used it to add length to the peplum.

Folded fabric hem
All in all I think it took me about 4 hours to make. Most of the time was spent un-picking the seams of the original t-shirt. I could have cut them off, but then I wouldn't have quite had enough fabric, which you can see on the picture at the top of the page showing where the front bodice pattern piece ends.

Unfortunately I did not pattern match the fabric. There wasn't enough, if there had been enough though I would not have been able to keep the neckline, because like a lot of RTW clothes the manufacturer hadn't matched the pattern between the front and back either!


What a silly pose to show off my lack of pattern matching!!

I love my new top, it fits so much nicer than any RTW top I could buy and for a fiver it was an absolute bargain. I also have a new appreciation of re-fashioning. It's a very painstaking process and I have absolutely no idea how Andrea has the patience to do it so often. But regardless, it's very rewarding and I will definitely be trying it again soon, once I have actually made Andrea's Name tag that is!

Wednesday, 12 March 2014

OUI! It's another Peplum!

I've done it again, I think I'm a little bit obsessed with Peplums at the moment! But I have to say, although I love all my Peplums equally, this one is definitely my favourite.

I used Vogue pattern V8815 and I actually started it well over a week ago. I remember it quite clearly because Barry had gone for a day session in Newcastle for a leaving do. (The guy wasn't even leaving he's just moving to another team a few pods up, but that clearly gives an excellent excuse for a piss up!) 

So, as I was home alone, I decided this was the perfect opportunity to move the dining table in front of the TV so that I could set up all of my sewing whilst watching BSG: Blood and chrome that I'd recorded off the telly a couple of weeks before!

What a mess!! But whilst the cat's away...

The pattern is wonderfully thought up and so easy. It went together like a dream, however, surprisingly enough it came with no facing pieces. But that's no big deal, it gave me the perfect opportunity to draft my own! After tracing out the main pattern pieces, making adjustments for my size, I then took another piece of tissue, placed it over my pattern pieces and created what I now think is the best facing ever! It's sort of a semi-lining that goes all the way round the neck line and around the arm holes. It works an absolute treat, that design with what I now know is called 'under stitching', prevents that horrible flappy facing problem.

No flappy facing for me.

You could use bias binding around the neckline, but I like the clean lines that I've produced without it.


The fabric that I used is a quilting cotton in Glimma by Lotta Jansdotta, which I got on sale at Guthrie and Ghani. For the bow at the back I used some ribbon from Boyes. You can't beat good old Boyes for little bits like that, especially when you make a last minute decision.
This fabric probably wasn't the best choice for this top. There was very little hope of me pattern matching with all the wave lines. I'd match it in one place but the then rest is out, so I just had to roll with it. This is exactly the fabric that I had in mind for this pattern, so the lines had to lie where they have.

I wore this top on Friday for Barry's birthday dinner, however we got very (very very very) tipsy and no photo's were taken of the top. So, as I'd washed and ironed it again over the weekend I thought I'd wear it to work today, which gave us an excellent opportunity to get pictures.

Overall I totally love this top, it's the right shape with the right pattern and it fits beautifully. (Or at least I think it does!!) I'm definitely going to make more. 

Monday, 26 August 2013

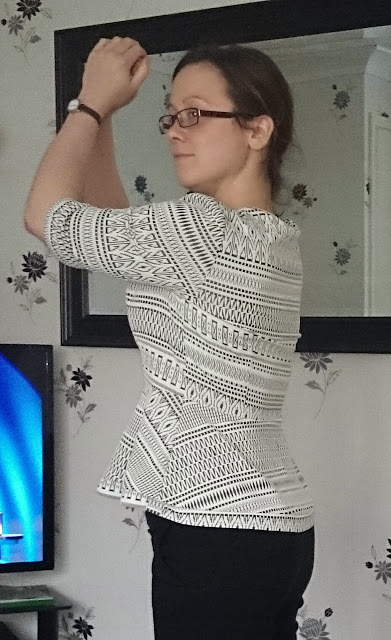
Simplicity 1699

Simplicity has a sale on! I had to hold myself back, I have a number of patterns that I would like, however I managed to stick to 4. One of the patterns that I got was Simplicity 1699, it has 4 patterns with it and I chose to make the peplum top in a red polka dot cotton/poly mix.


This was quite a quick pattern to complete considering that it's almost a dress with all the pattern pieces, so I look forward to making the dress at some point.


I didn't quite fancy the short sleeves, so I used the pieces for the longer sleeves from the dress. 


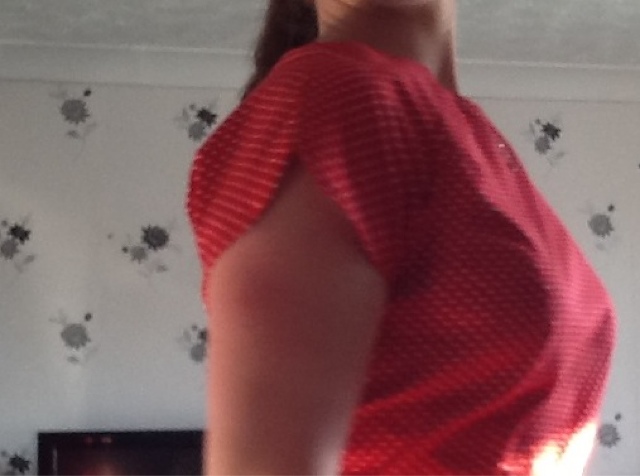
Some of these pics almost make it look like I'm wearing a paper bag, but I swear it doesn't look like that in real life. The top could have done with being a little more snug, but I like to have a bit of ease.


I don't know how the photo's came out so badly, or why I'm not smiling! I would, however, like to point out that we've spent half the day down the pub in front of the sun, so a mixture of Baz being a bit drunk and me being a bit sun sizzled has produced some rather rubbish pics!!!

The detail on the sleeves is lovely, the way the edge is curved, but it confused the heck out of me when I started to created the hem, I just didn't even click when I was cutting out the pieces, but it's a nice finish.

I meant to use the instructions this time, but I got a little carried away and forgot all about them!  The pieces all came together quite neatly, this was quite an easy garment to construct. I think it's time for that challenge that I've been putting off, I think it's time to make those trousers... Watch this space!!!