Showing posts with label darts. Show all posts

Tuesday, 15 April 2014

The First Lady Peplum

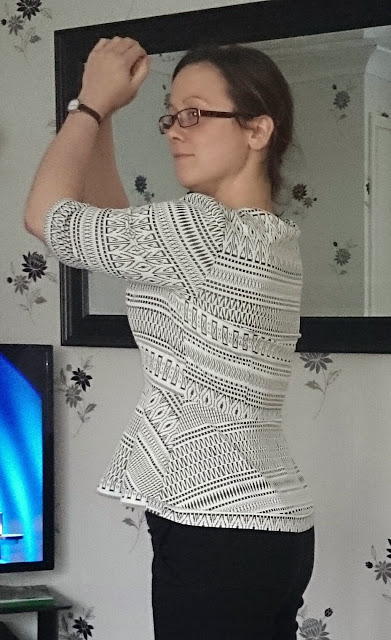
So I mentioned yesterday that I had another Peplum on the way, not wanting to disappoint, I made sure that I wore it today so I could get a few snaps before I left for work.

After the Great British Sewing Bee finished last week, I thought it was about time that I made myself an African Wax print Peplum, I was so inspired by Chinelo Bally's Peplums that I just had to have one! I was absolutely gutted that she didn't win, but Heather really pulled it out of the bag with her final dress.


So, first things first I had to go and find some African Wax print material. This was a little tricky. I wanted some similar to the one she used above. But everything that I could find had massive prints, that I could only really use in a dress or long skirt. I ended up with this bright bright pink fabric from eBay.


It's a little out of my comfort zone to use such a bright colour. I wasn't even sure I could wear it let alone pull it off. But I thought go on, let's just give it a bash and see what I end up with!
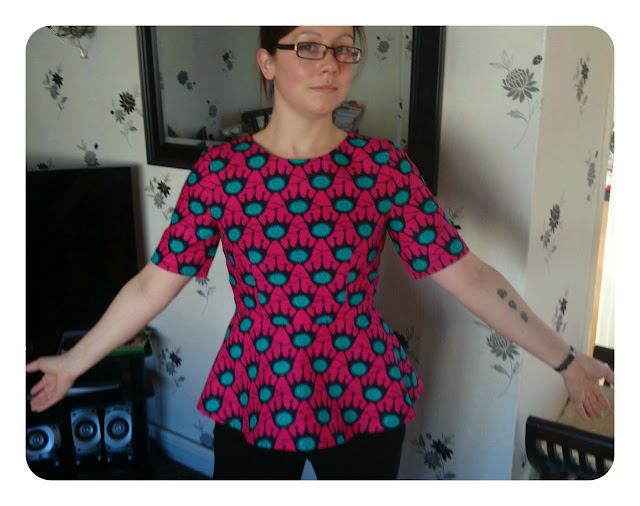
I used my favourite Peplum pattern, Vogue 8815. It's so easy to construct, so I made it in almost no time at all. The bodice consists of 2 darts in the front and 4 on the back, I don't think you can get any more simple than that for a bodice.


The fabric is quite stiff and has almost no give in it at all. So, as a result it feels quite snug, but it's not uncomfortable until I try and raise my hands above my head! I'm thinking I may take the seams out a little, just to give a little more ease. My previous version of this top was made from some quilting cotton and that's no where near as stiff as this.

It was quite difficult trying to pattern match with this fabric as the pattern doesn't quite have the same spacing all the way round. I only realised this after cutting the fabric, so in places it doesn't quite match where I feel it should.

The resulted garment is growing on me and I think the more I wear it, the more I'll like it. I just need to be more comfortable with bright colours. After all, before I started to make my own clothes, most of my wardrobe was shades of grey and black so I think I'm being rather brave don't you?!

Monday, 7 April 2014

My first Re-fashion!

I'm really excited to tell you that I have completed my first re-fashion! This is something that I have never delved in to, I'm really not sure why as it's a brilliant way of recycling, so this is the first of many.

This all started when I put my name down for the 'Name Tag Swap' that Rachel from House of Pinheiro is organising on her blog. Basically you have to create a name tag for your new buddy and they have to make one for you. Name tags must be received by 9th May and Rachel has very kindly pinned some for inspiration here.

My buddy is the amazing Andrea from Little did you know. I've had an extremely thorough stalk read through her blog to get some ideas for the name tag. Andrea's main interest is in re-fashioning clothes, something that I had never really considered trying. So I thought what better way to get to know someone than to walk a mile in their shoes?!!

I don't currently have any clothes that I could re-fashion. Mainly because I often donate them to charity. Now, in my little town, there are only 3 charity shops to choose from. I spent a Saturday afternoon looking in them and not one thing jumped out at me as something that I'd like to re-fashion. How the heck does Andrea find all of these gems?? 

I gave up. I went to Tesco's for some tights and I came out with this as well:


Slightly hideous, it was a size 18 shapeless 3/4 sleeve t-shirt. I think I saw the sale rack and out of desperation grabbed it because it was only a fiver. Looking at this picture it really is even more hideous than I remember! 

As soon as I got it home I knew exactly what it would become. I bet you can't guess!! :-P

I did cheat a little. OK a lot. First of all I un-picked the side seams and removed the sleeves. I then took out my traced pattern pieces from my favourite Peplum (yep I'm soooo predictable) pattern, Vogue 8815, and placed them over the t-shirt like so: 

 
I wanted to keep the neckline as I liked the pink piping and it sat fine on my neck. So I folded the t-shirt and placed the paper pattern to match with the fold and shoulder seams.

Yep, I thought I was pretty darn clever for doing that!

Unfortunately, the peplum pattern pieces were a little too big and I didn't quite have enough fabric left to make them. So, what I did was make them a little bit shorter. The T-shirt also came with a folded piece of fabric as the hem, I detached it carefully and used it to add length to the peplum.

Folded fabric hem
All in all I think it took me about 4 hours to make. Most of the time was spent un-picking the seams of the original t-shirt. I could have cut them off, but then I wouldn't have quite had enough fabric, which you can see on the picture at the top of the page showing where the front bodice pattern piece ends.

Unfortunately I did not pattern match the fabric. There wasn't enough, if there had been enough though I would not have been able to keep the neckline, because like a lot of RTW clothes the manufacturer hadn't matched the pattern between the front and back either!


What a silly pose to show off my lack of pattern matching!!

I love my new top, it fits so much nicer than any RTW top I could buy and for a fiver it was an absolute bargain. I also have a new appreciation of re-fashioning. It's a very painstaking process and I have absolutely no idea how Andrea has the patience to do it so often. But regardless, it's very rewarding and I will definitely be trying it again soon, once I have actually made Andrea's Name tag that is!

Wednesday, 15 January 2014

Some new firsts!

This must be my most proudest make so far. I know I haven't made a lot so far, but I haven't even been sewing a year yet, so all of my makes are huge accomplishments for me! However, this one I really feel is the biggest.

I've had this pattern in my stash for some time now. I take it out, have a peek and put it back, constantly thinking 'no I'm not ready for that yet'. But this time I threw caution to the wind and just did it! It's a shirt pattern, a proper, formal, suited and booted shirt. Simplicity 1538.

So this is my first shirt. I decided to pick option D, it's formal, but with its' contrasting cuff lining and neck inner it has a little playfulness in it.


I also decided to give tracing paper a go for tracing the pattern. I bought a roll of it cheap on Amazon and as I was tracing away I was thinking to myself that I couldn't believe that I hadn't already tried it previously. It sat still and in place for the whole time that I was tracing. It didn't need ironing and even the faintest of patterns could be seen through it. However, it's a bit too thick and strong. Pins needed a little persuasion to go through it and I can't say for sure, but it may have blunted them a little.


The fabric that I used for the shirt I bought from Minerva before Christmas, exactly with this pattern in mind. It's little blue flowers and the contrast fabric is a lovely blue stripe. I have plans to make this shirt with the contrasting fabric the other way round. I did intend to make this shirt with the blue stripey fabric and have the flowers on the inside as contrast, but I think the day that I cut the fabric I was feeling rather whimsical and decided that as I was braving a proper shirt pattern that I might as well go whole hog and use some crazy flower fabric for it too.


I followed the pattern instructions pretty much all the way through. Even when I thought I knew better I still stuck to them. I didn't want to make any silly mistakes. I wouldn't normally have attached the sleeves as it instructed on the pattern. It instructs you to stitch 2 lines of wide stitch length between the dots and then to tighten them until it fits between the two dots between the yoke and front panel, then to even out. Normally, I would pin the arm on at the shoulder, matching dots, then at the top where you have the ease, I would have evenly eased it in, basting with pins. Then I would have hand basted, before machine stitching in place. The way that the pattern instructs you to do it is quicker, but I don't feel like the results are as good. It looks acceptable, I'm probably just being picky!


The trickiest part of the construction was definitely the collar. However, I thought that may be the case before I started. It's very fiddly and I spent a lot of time pinning, re-pinning and making sure that it was even both sides before I committed to stitching it in place. I've found that top stitching close to edges is my least favourite thing to do, I guess with practice I'll get better at it and I'll learn to enjoy it more.

The pattern also instructs you to gather the back piece between the dots before attaching to the yoke, I did not follow this and opted to do my own thing and so I inserted a box pleat. Unfortunately, in the picture below, my pony tail is hiding that detail!

I used some buttons that I would normally associate with children's clothes, but they are so pretty and sweet that I really wanted to use them on this shirt. They're quite subtle, but when you get close up it's a lovely detail.
Button on the cuff
I wore my new shirt to work on Monday and it fit so well. I did measure and make changes to the pattern, grading between 10 - 12 from the shoulders to the waist, then back to a 10 for the hips/seat. I have quite an active job, I'm often bending and stretching and not once did the shirt feel too tight, I felt like I had just enough ease to do my day job in it. Strictly speaking I should probably wear Dickies and steel toe caps to work, but since a lot of work is done remotely now, I spend most of my days at my desk.