Tuesday 29 July 2014

Simplicity Jiffy 1356

Good Afternoon peeps!

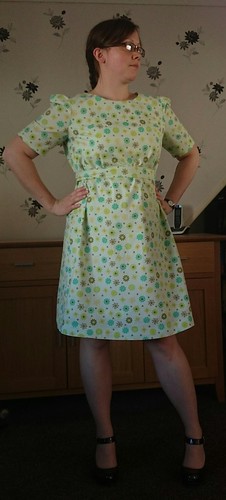
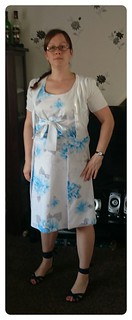
This dress was totally inspired by a tweet from @StitchOdyssey back in June, who was undecided on it. But I knew as soon as I saw it that I had to have it! Reality, however, is a slightly different story...

Seems like I finished this dress ages ago - according to my Twitter account 13th July! I've just not got round to getting any pics taken. I also haven't worn it. I just keep looking at it and putting it back in my wardrobe because I'm just not 100% sure that I like it. But then again I feel like that about everything nowadays.

IMG_20140729_101603IMG_20140729_101636 IMG_20140729_101709

I've teamed it up with a little white cardi I got from Tesco's last summer and some blue sandals from Matalan that I absolutely hated last year as they are too flat, but funnily enough this year they've barely been off my feet since the sun came out!

IMG_20140729_101741 IMG_20140729_101915 IMG_20140729_110535

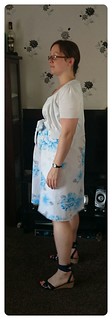
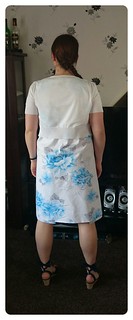
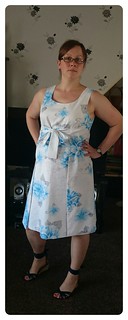
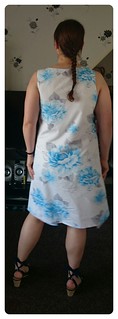
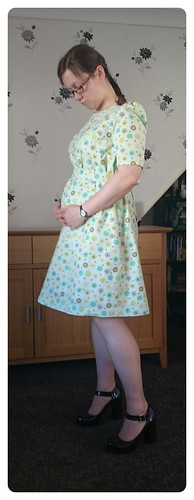
This is without the cardi. Think I prefer it with the cardi on. But I'm not much of a fan of sleeveless anyway.

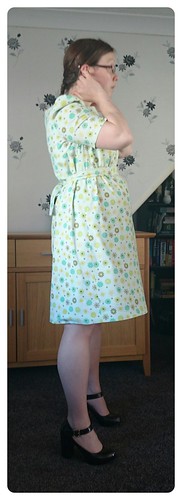
It was incredibly easy to make, as long as you follow the instructions. I kinda winged it to begin with thinking I could pull the dress through at the shoulder seams - what was I thinking? Must have been a 'baby brain' moment because that just wasn't happening. I referred back to the instructions and un-picked a fair bit of stitching and got it right in the end!

I did not make it double sided. I like my necklines under-stitched and stabilised with fusible interfacing. Although I could probably wear it either way round, I probably won't. The big blue flowers are far more interesting than a plain white cotton dress (Which is what I used for the other side).

IMG_20140729_110602

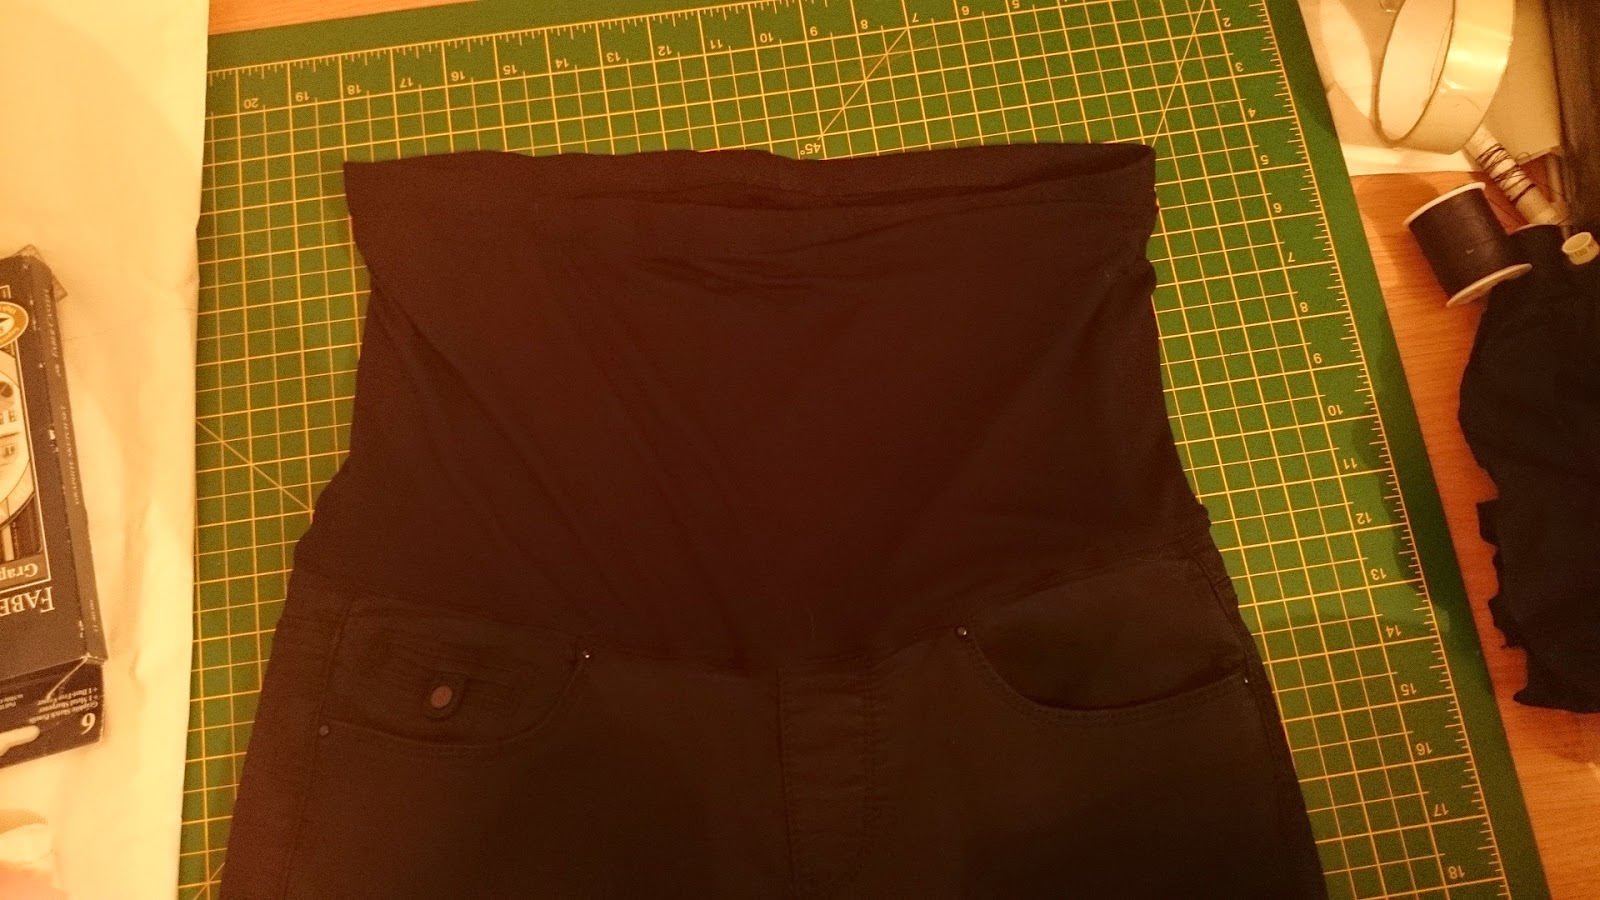
In my opinion, this dress isn't very flattering. It has very little shape, but that may be accentuated by my growing bump that's kinda making me look shapeless enough as it is! It is however, very practical used as a maternity dress. I graded from a size 10 at the shoulders to a 12 just under the bust and then out to a 14 from the waist down. 

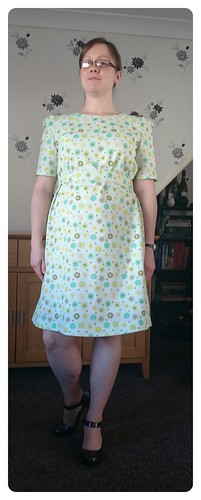
I'm pretty certain that even at my biggest it will still fit, you attach 2 pieces of ribbon on either side of the front dress piece (one under the bust and one on the waist on both sides) and then you have the tie at the front, both of which are quite generous in length. It's very comfy indeed, so despite my reservations as to whether this dress is truly 'me' I'll definitely get my wear out of it!

Have you made one of these dresses? I'd love to see it on other people, who knows I might even make another post- pregnancy!

Monday 14 July 2014

Style 4145 - A vintage maternity dress pattern

Good Afternoon, did you have a nice weekend?

I had my Dad staying with me due to some unfortunate issues with one of his houses, but he's now returned to his home in Spain. I won't go into any details about it, but it has been a very stressful week for him and my Step-mum. Fortunately, the Tour de France is on at the moment, which very quickly lifted his spirits and gave me a few hours to get some sewing in (he's Cycling mad).Then, the World cup final was on last night, so I got another couple of hours to spend on sewing, Sports season is just the best!!!

So I have a couple of projects on the go, one of which I think I will get to share very soon. Today, however, I'd like to share with you a dress that I finished last week. I was very excited to receive this pattern that I'd bought from eBay. I'd seen an episode of that old show 'Bewitched' where Samantha was pregnant and I totally adored the style of dress that she was wearing, so when I'd seen this pattern I knew I had to have it. It's not exactly the same as the dress that Samantha wore, but a similar style with fitting coming from the seam just above the bust.

I picked option 2, but I had no idea what fabric I was going to use to make it with. So, I had a rummage through my stash and picked out some rather fitting fabric (IMO). It's some Moda quilting cotton that I picked up from my local sewing shop in Darlington.

IMG_20140714_085933

I didn't really make any adjustments to the dress, apart from lowering the neckline a little. The original neckline would have strangled me so I had to make it a little bigger, but as I had traced out all of the pieces that was no big deal.

I started off by making a toile, I wasn't sure how this pattern was going to fit and I hadn't made anything from a 'Style' pattern before. They seemed to have been a fairly mainstream pattern company back in the day, but when I have searched the internet for more information about them I've come up with nothing. Were they bought out by one of the other main pattern companies or did they just change their name at some point??

IMG_20140714_085906 IMG_20140714_085826 IMG_20140714_085731
As you can see I've added a belt! After I'd made the dress I felt that it was very tent-like. I guess that may just be because my bump isn't big enough yet, but whatever the reason it looked more like a night-dress than a day dress. I made the belt from the same belt pattern piece that I got with my chambray shirt dress pattern that you can find here. I like the length and width of this belt, so why not re-use it?!

As I made the toile from lightweight white cotton, I then used it to fully line the dress as this cotton was a little too translucent in the light for my liking.

IMG_20140714_085619

I wasn't really sure if I liked this dress, so today was the first time that I had worn it. I didn't fall out with the pattern at all whilst I was making it, so there's no bad vibes to it. As I said, I made very little adjustment to it, which really saves a lot of time. I just wasn't sure if the fabric that I had chosen was really 'me', but now I see these pictures I'm actually thinking it's not too bad after all!

Monday 7 July 2014

Maternity jeans refashion

Good morning! Did you have a nice weekend? I had a wonderful weekend! I spent most of it relaxing, which was most excellent. Saturday was almost a complete write off. I'd looked outside, concluded that the weather wasn't good enough to leave the house and spent most of the day sewing and watching Stargate!

Actually, in a sense, Saturday was actually very productive. I completed BHL's Polly top, along with modifications for my growing tummy, however as I had put it over my Dressmaker's dummy I forgot all about it and so I'm not going to talk about that one today! I also cut a hand towel in half, added some binding down the raw edge and ta-da I now have two small towels for use in the kitchen. I'd have taken photo's, but in reality it looks even more mundane than I've described!!!

Then I finally got round to modifying some maternity jeans that I bought from eBay. I'd received 2 in the listing, both faded black, one with 'over the bump' style band and the other with the 'under the bump' style band. I did not like the under the bump style at all. after trying them on I found that they made me look like I had a muffin top and the band was quite tight and stiff which kinda made them uncomfortable to wear. So, I had to do something about that.

'Under the bump' style waistband

I have a couple of pairs of blue jeans with the over the bump style band and upon closer inspection I thought that I'd have no problem at all duplicating this style of band. All I needed was a seam ripper, some thread and some soft black jersey material. So first of all I removed that nasty waistband:


It came off easy enough, but there were many layers of stitching keeping it all together. They'd used a thick band of elastic and covered it with some thick jersey, each layer stitched individually to the jeans.

Then I measure the waistline of the jeans and my bump and cut out a large rectangle of jersey material. The jersey that I used was a 2 way stretch, so I made sure that it stretched horizontally and not vertically to accommodate a growing bump. As I was going to be doubling the band up I'd made it twice as big as I'd needed it and stitched in the elastic half way down the seamed side and then folded over so that the raw edges could be attached to the jeans. For some extra security I folded the jersey over the elastic waistband again and stitched in place with a zig zag stitch.


I don't think this picture is very clear with it all being black, but it now looks like the waistband of a pair of leggings. I then stitched right sides together the front layer of the jersey to the waist of the jeans, then folded the raw edge of the inner layer of jersey and pinned it to the inside so that no raw edges of jeans are exposed and stitched in place from the right side layer, through the denim so that it would catch the inner layer. I used my stretch stitch for this for extra durability.


I think they turned out pretty well and they are sooooo comfy. Obviously not the most attractive but the bump band will always be covered by a top of some description! But... can you see how faded the jeans are? They look more like grey jeans than black. So I bought some Dylon renovator to have a go at returning them to black. I bought this one from the Quilted bear on Amazon for £4.30 inc p&p.


I've never tried dying any of my clothing before, so this was a bit of a test for me. You use one sachet for up to 300g of clothing and both sachets for up to 600g. The jeans weighed in at just over 300g so I decided to go for just the one sachet. I also added salt like it suggests for really faded items. The instructions on the back are pretty comprehensive. So you chuck it in your washing machine on a normal 40'c cycle with detergent and at the end of the cycle you end up with black jeans! It's amazing, I couldn't believe my eyes as some of the reviews for this product were a little mixed. 


I must have taken at least 10 photo's of the finished product, messing around with my camera settings but I couldn't show you exactly how black they are. A mixture of the flash or the light in my sewing room was causing some issues and this is the best picture that I managed to take, so you'll have to take my word on this one - it worked.

Overall, I'm really pleased with the outcome of these. I now have what looks to be a brand new pair of black Maternity jeans with an 'over the bump' style band, for a fraction of the cost of a pair in the shops. I bought the two pairs of jeans from eBay at £6 inc p&p, the jersey was some from my stash that originally cost £3 p/m and half a packet of black renovator £2.15, so all in, it probably came to about £6-7. These maternity jeans would have cost £25 - £30 new and I've given them a new life!